Identity Provider Instance
These are the configuration changes to be made in the identity provider instance when setting up an OAuth Connection.
These instructions apply to ServiceNow. Other identity providers may vary.
Create Application Registry
In native ServiceNow, navigate to System OAuth > Application Registry and click New.

On the interceptor page, click Create an OAuth API endpoint for external clients.

The fields to be configured for the Application Registry record are as follows:
Name
Name of the OAuth app
<Your Unique Name>
Client ID*
The client id of the OAuth app
[read-only] (automatically generated)
Client Secret*
The client secret of the OAuth app
Leave [Blank] to automatically generate
Refresh Token Lifespan*
The number of seconds a refresh token issued will be good for
8,640,000 (default value - automatically populated)
Access Token Lifespan*
The number of seconds an access token issued will be good for
1,800 (default value - automatically populated)
Comments
Comments about the OAuth app
<Your description of the purpose of the OAuth entity>
*These values are to be left as-is.
Your Application Registries New Record should look like this:

Submit the record.
If you re-open the record after submitting it, you will see that the Client Secret has been populated.
Configure Connection
If you haven't already done so, you will need to create an Inbound user in this instance. See here for details.
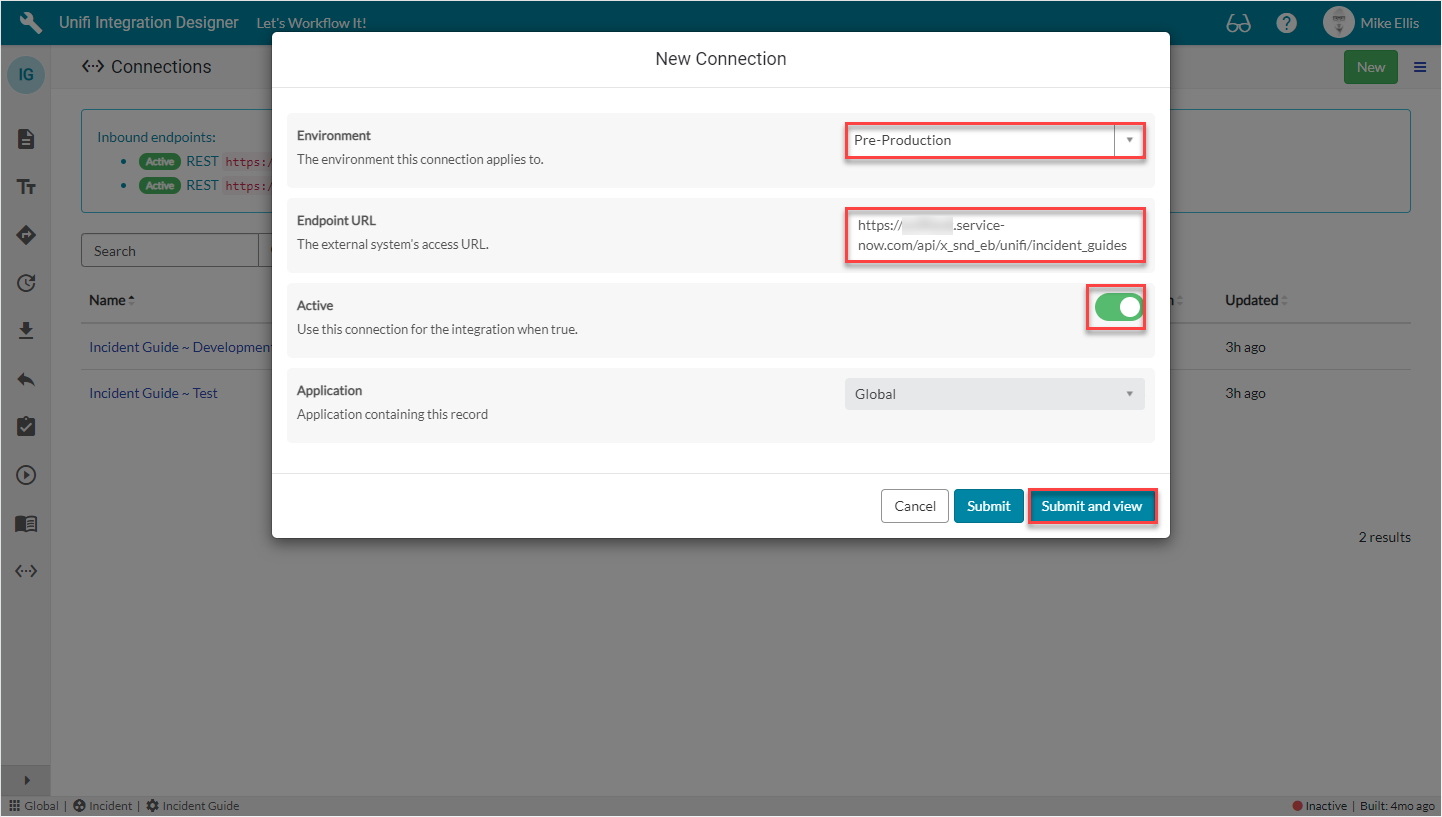
In Unifi Integration Designer, navigate to Connections and click New.
We have chosen to configure a Connection for the Pre-Production environment because we have already configured connections in the Consumer Instance for both the Development and Test environments. Choose whichever environment is appropriate for your requirements.
The fields to be configured for the New Connection modal are as follows:
Environment
The environment this connection applies to.
'Pre-Production'
Endpoint URL
The external system's access URL.
<External system Endpoint URL>
Active
Use this connection for the integration when true.
<true>
Outbound Connectivity
The format of the Endpoint URL is as follows:
https://<your_consumer_instance>.service-now.com/<your_consumer_resource_path>
The entire Endpoint URL can be easily obtained from the automatically created Message Resource on the Unifi Scripted REST API (displayed in the widget at the top of the Connections page) in the other instance.

Your New Connection modal should look like this:

Submit and view to further configure the Connection.
Connection Details
Although we will be providing an OAuth Token for the external instance to consume when connecting to this instance, we will use Basic authentication to connect outbound with the Consumer Instance.
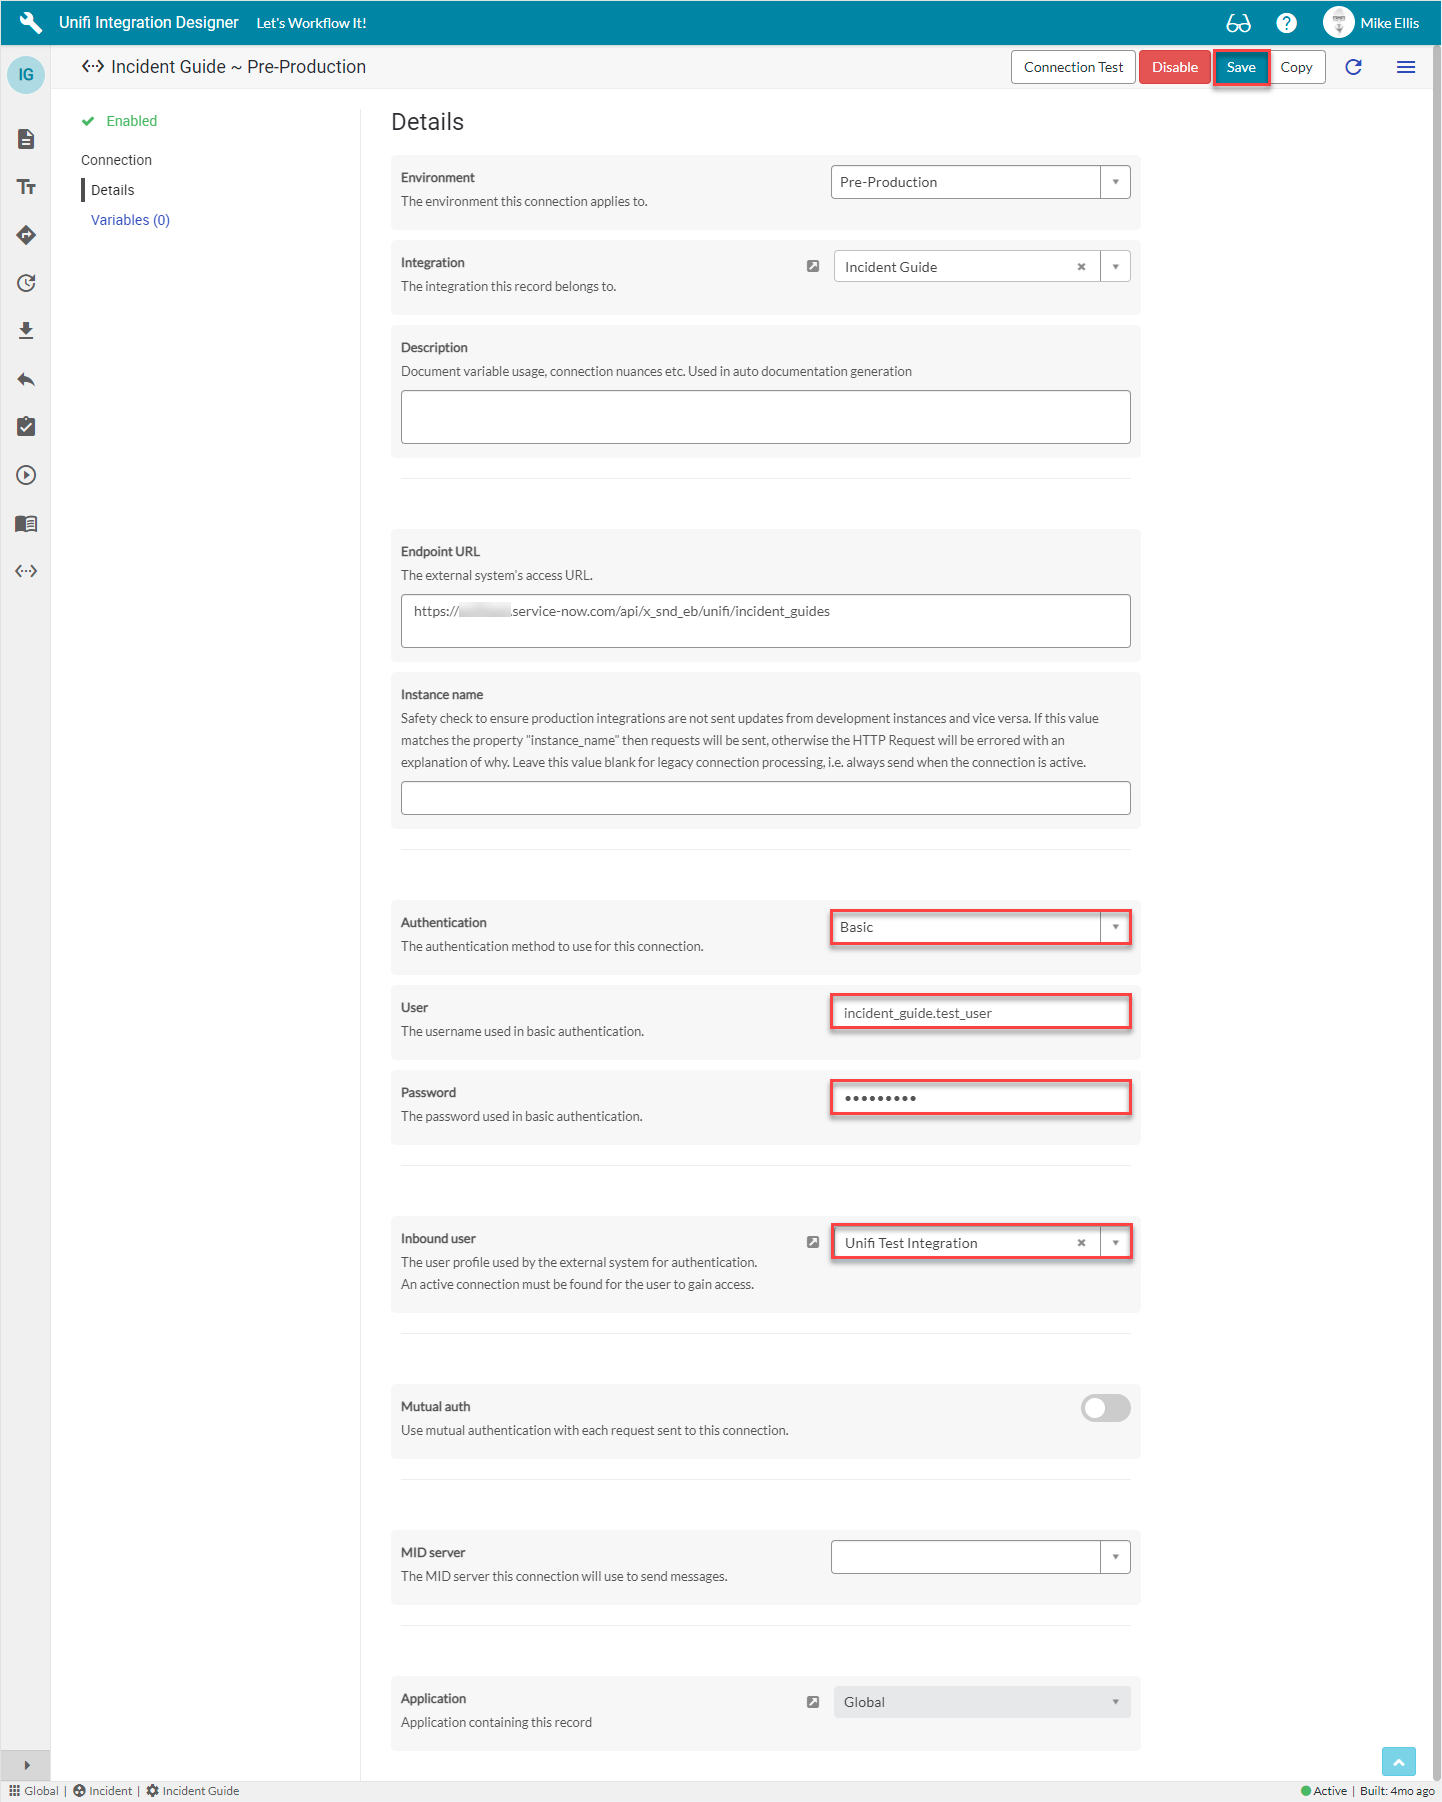
The fields to be configured for the Details form are as follows:
Authentication
The authentication method to use for this connection.
'Basic'
User
The username used in basic authentication.
<external.system.user>
Password
The password used in basic authentication.
<External system user password>
Inbound user
The user profile used by the external system for authentication. An active connection must be found for the user to gain access.
lookup: <Your Inbound User>
Your Details form should look like this:

Save the Connection.
At this point you can perform a basic Connection test. For instructions, see here.
Next, configure the Identity Consumer Instance.
Was this helpful?
