Connection
The Connection allows messages to be sent and received and stores all the authentication details of the Integration specific to a single environment.
Inbound User
Before configuring the Connection, you need to ensure you have a user in the instance to use as the Inbound user for the Integration. To configure your Inbound user:
In the native ServiceNow window, navigate to User Administration > Users. Click New.
The fields to be configured for the User record are as follows:
User ID
The id of the user (to be used by the external system for authentication).
<your.integration_user>
First name
The integration user's first name.
<Your First Name>
Last name
The integration user's last name.
<Your Last Name>
Password
The user's password (to be used in basic authentication).
<Your Password>
Roles
The role required for access to the integrated records.
x_snd_eb_integration
The x_snd_eb.integration role gives access to the Unifi web services. You may need to assign additional roles depending on the process functionality used i.e. things like gs.hasRole(‘itil’) in business rules/scripts etc.
Connection
Although you can set up many connections to enable switching between environments (one connection per environment), it is worth noting that only one connection can be active for an Integration at a time.
We will, however, set up only one connection in the 'Development' environment.
Back in the Unifi Integration Designer window, after clicking the 'Connections' icon, the first thing you will notice is a widget at the top of the page which clearly displays the inbound endpoints (REST Resources) which were automatically created when the Process was configured.
This is given for your information only as we are only concerned in this Guide with sending outbound messages to the table API of another ServiceNow instance (i.e. your Personal Developer Instance, ‘PDI’). However, It will be of value should you go on to configure polling integrations following our Poller Guides (which will utilize this same Connection).
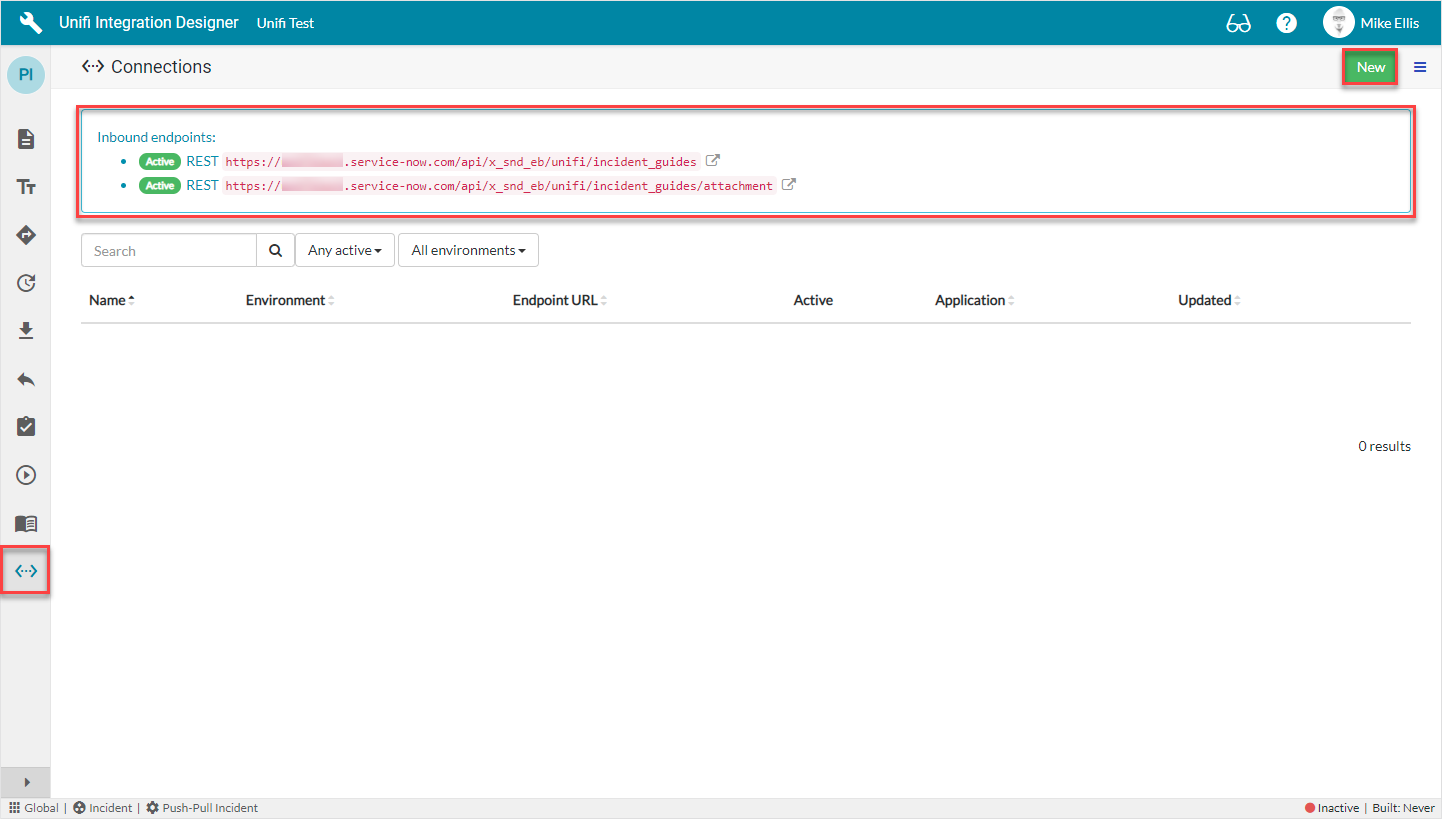
Click New.
The fields to be configured for the New Connection modal are as follows:
Environment
The environment this connection applies to.
'Development'
Endpoint URL
The external system's access URL.
<External system Endpoint URL>
Active
Use this connection for the integration when true.
<true>
Outbound Connectivity
The format of the Endpoint URL for the ServiceNow Table API is as follows:
https://<your_developer_instance>.service-now.com/api/now/table/<table_name>
If you are going to configure this Outbound Integration only, then use the full URL e.g. https://<your_developer_instance>.service-now.com/api/now/table/incident
If you are going to configure the Pollers also, then truncate the URL as follows https://<your_developer_instance>.service-now.com/api/now
In which case, the /table/incident part of the URL will need to be added to the 'Path' of the outbound messages (and the Endpoint URLs of the relevant Pollers).
This will facilitate this same connection being used for both the Table API and Attachment API (as per the Incident Attachment Poller Guide).
Your New Connection modal should look like this:
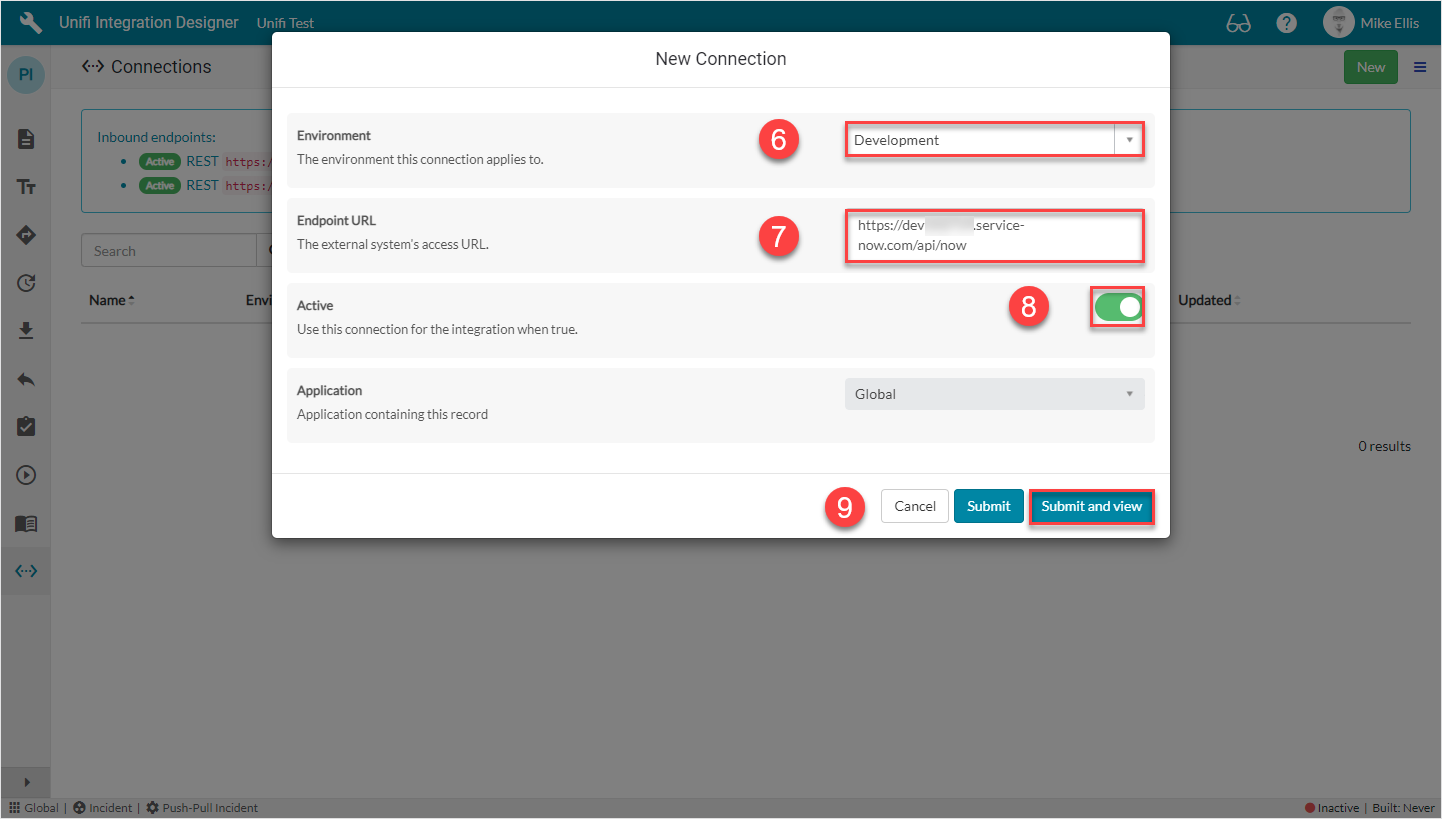
Click 'Submit and view'.
Clicking 'Submit' will redirect you to the list view of the record you're creating. Clicking 'Submit and view' will redirect you to the newly created record.
Connection Details
The fields to be configured for the Details form are as follows:
Authentication
The authentication method to use for this connection.
'Basic'
User*
The username used in basic authentication.
<external.system.user>
Password*
The password used in basic authentication.
<External system user password>
Inbound user**
The user profile used by the external system for authentication. An active connection must be found for the user to gain access.
lookup: <Your Inbound user>
*(External) User/Password: As created/set in your PDI.
**Inbound user: As created above.
Your Details form should look like this:
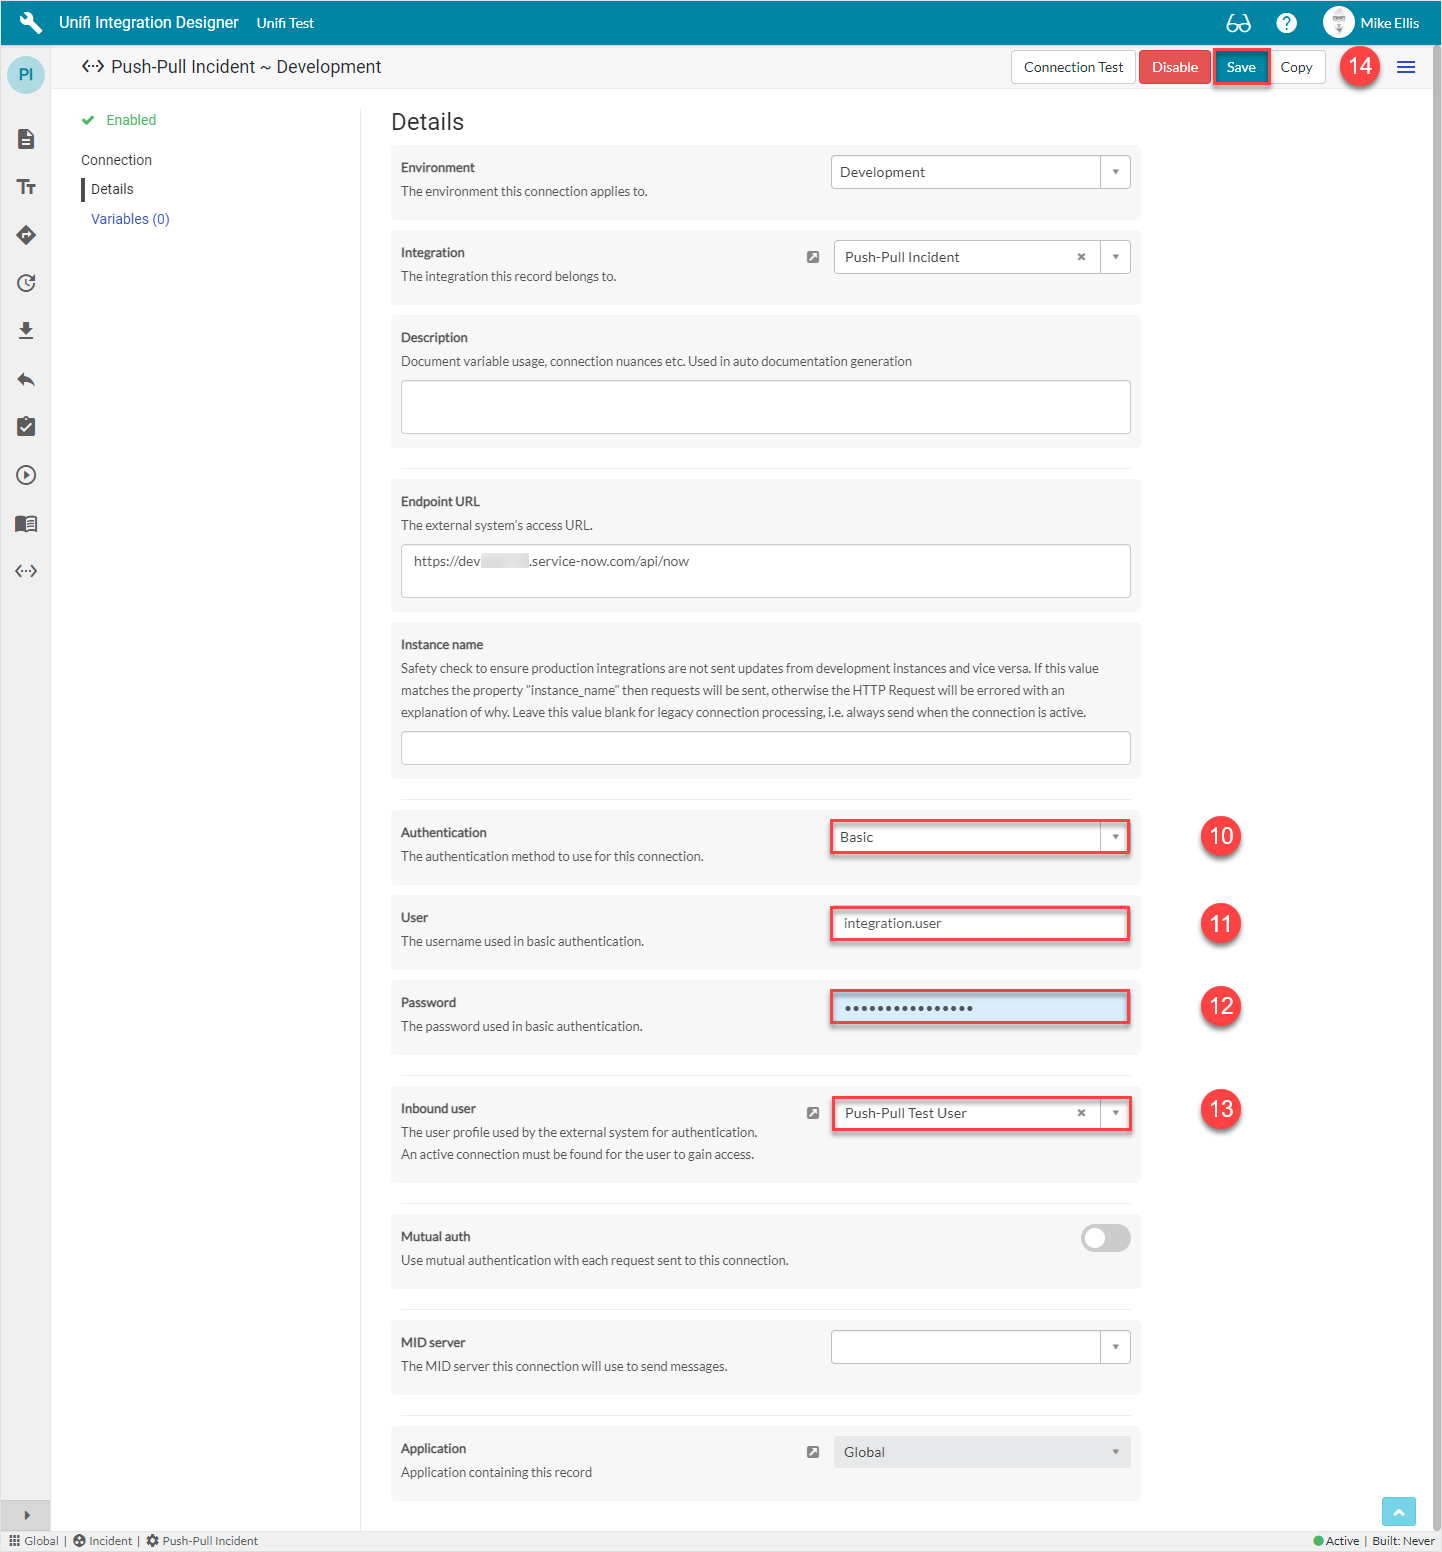
Save the Connection.
Connection Test
At this stage you can carry our a basic connection test which verifies whether the user is authorized (i.e. whether you've configured the user/password/roles correctly). To do this, click Connection Test.

Then, on the Connection Test modal, click Test.
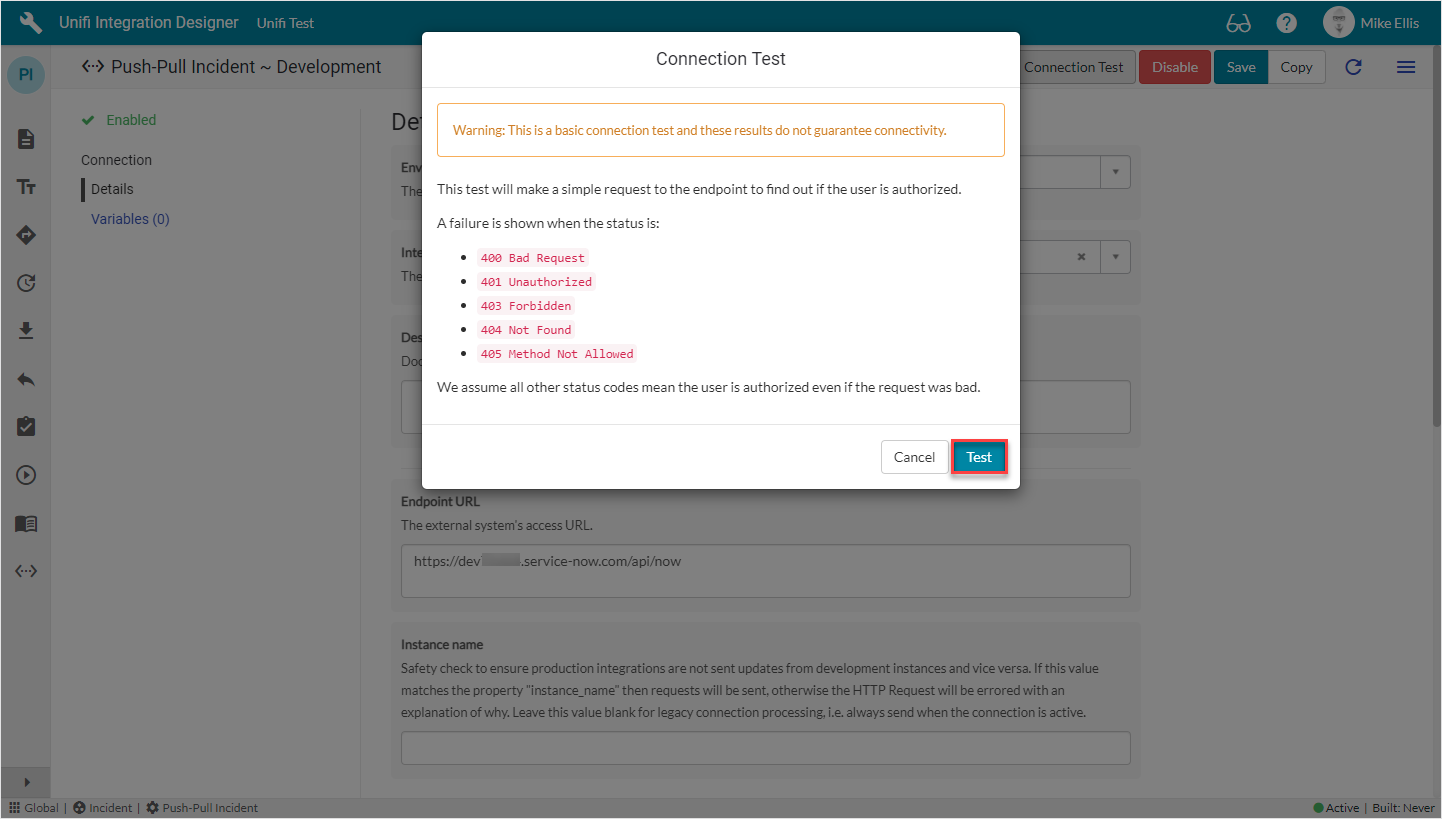
The results (Pass/Fail) will be displayed.
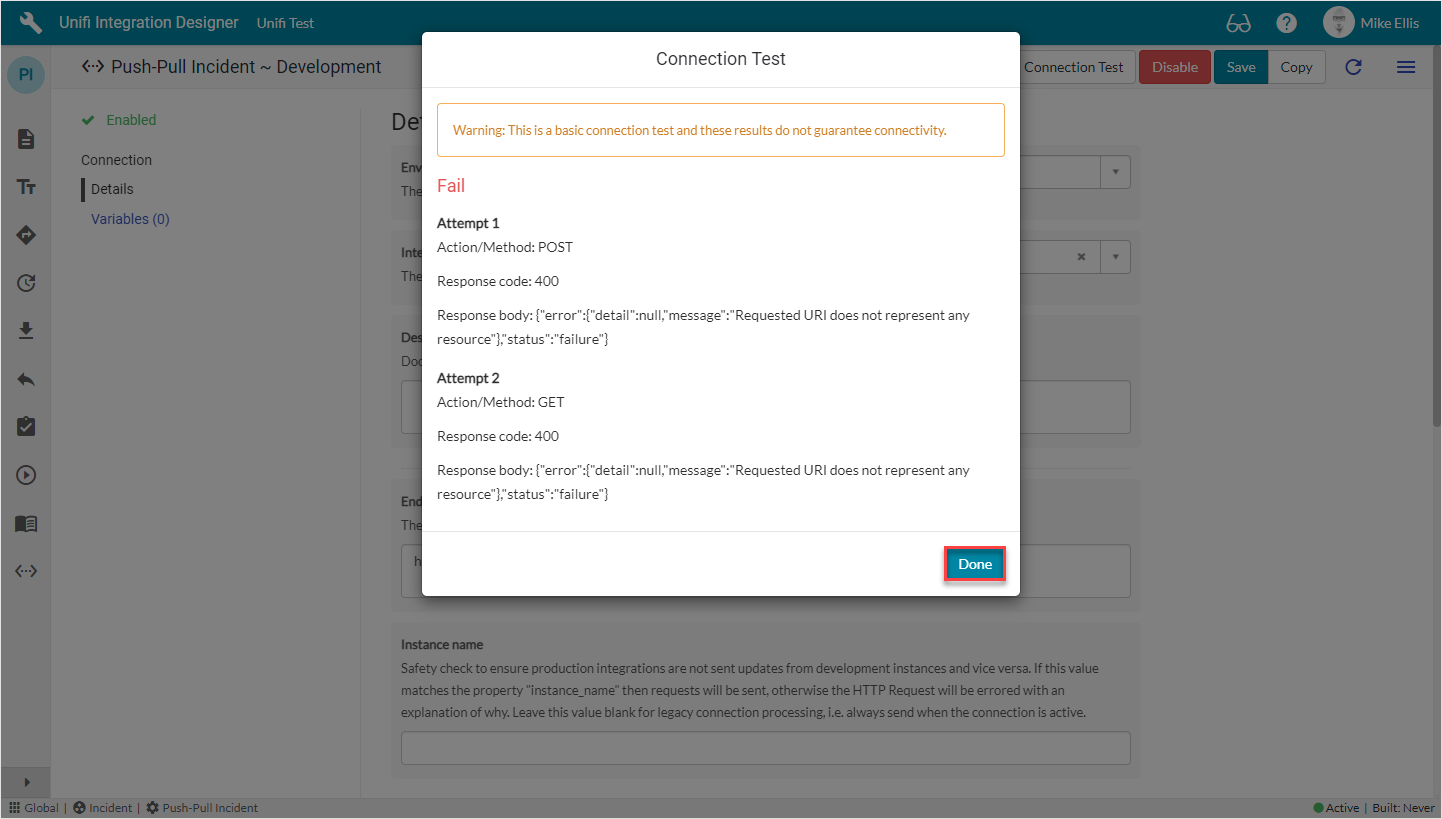
If you attempt the test against the truncated URL you will receive this error.
Click Done.
The main, manually configured elements are now in place for our Integration to work. We are now ready to configure and test each of our Scenarios in turn.
There is no need to manually configure a Trigger (Business Rule) on the Process table being integrated as Unifi will automatically create one for us (if one doesn't already exist).
Was this helpful?
