Connections
Use Connections to manage all your environment details for each integration.
A Connection is a property of an Integration. You must have a Connection set up to allow messages to be sent and received for your Integration.
The Connection stores all the authentication details of the Integration specific to a single environment. You can setup many Connections so you can easily switch between environments as necessary.
Activation
The Integration is controlled by the Connections. Making a Connection active will make it’s Integration active (and vice versa).
Although you can have multiple Connections per Integration, only one Connection can be active for an Integration at a time. Activating a different Connection will deactivate other Connections (for the Integration).
Connection Test
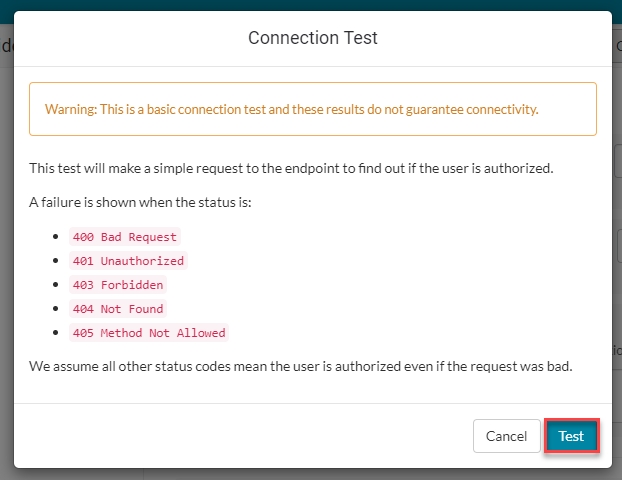
You can perform a basic connection test which will make a simple request to the endpoint to check if the user is authorized.
A failure is shown when the status is:
400 Bad Request401 Unauthorized403 Forbidden404 Not Found405 Method Not Allowed
Unifi will assume all other status codes mean the user is authorized even if the request was bad.
This is a basic connection test and the results do not guarantee connectivity.
To perform the test:
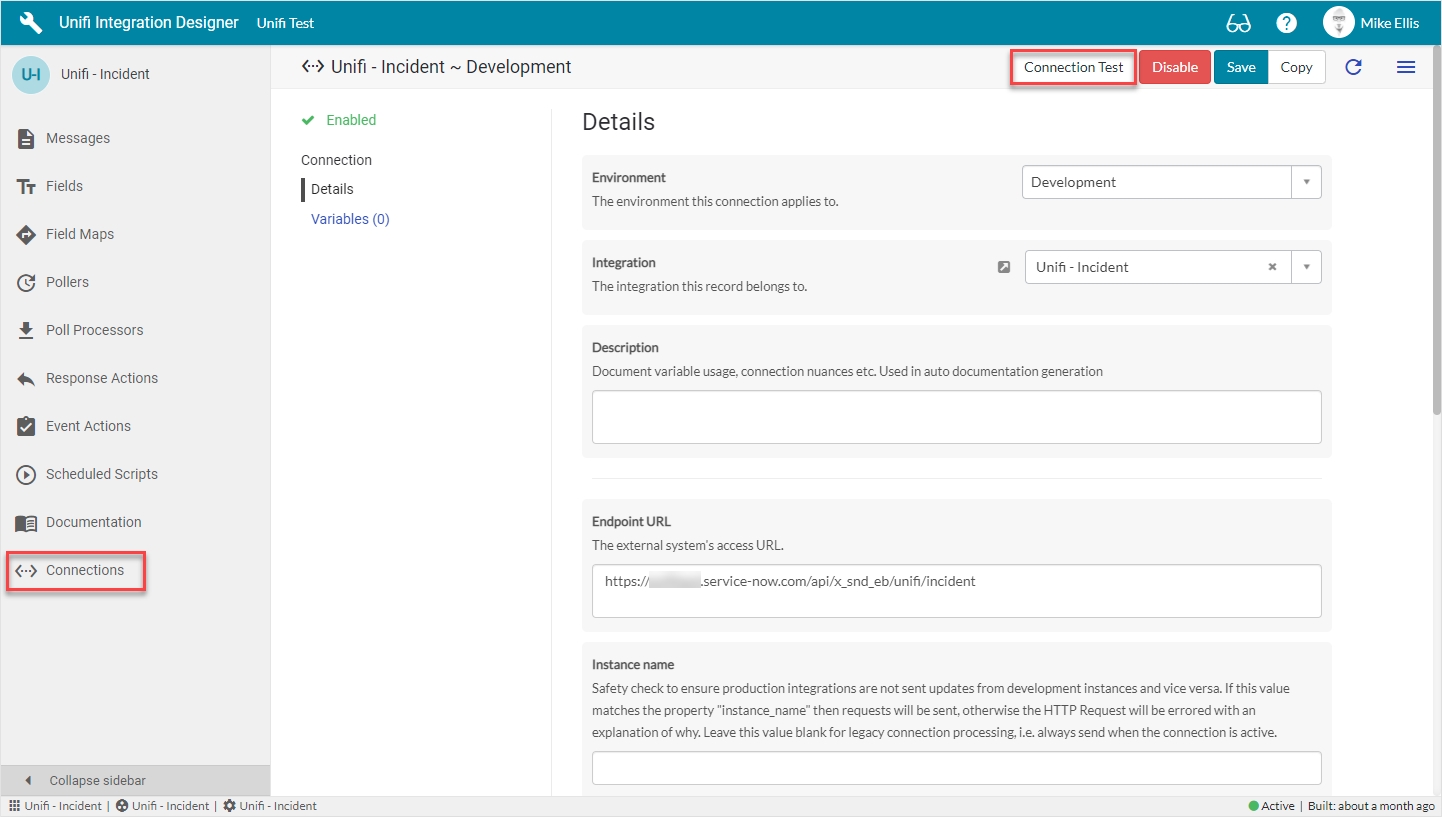
In Unifi Integration Designer, navigate to and open the Connection.
Click 'Connection Test'.
On the Connection Test Modal, click 'Test'.
When complete, the modal will display the results. They will show a maximum of two connection attempts, with the second attempt only running if the first attempt was not successful.
At this time, Unifi is simply showing the HTTP Response as a form of connection “sanity check”.
After viewing the results, click 'Done' to close the modal.
Environment
You can assign a Connection to a specific environment to make it easy to see what you are connecting to.
Available environment choices are:
Production
Pre-Production
Test
Development
Sandbox
Inbound Connectivity
The Connection is the link between the ServiceNow endpoint that is receiving messages and the Integration that is used to process them. If you want to receive messages from a remote system, you must specify an Inbound user which the remote system will use to authenticate with.
Inbound Endpoints
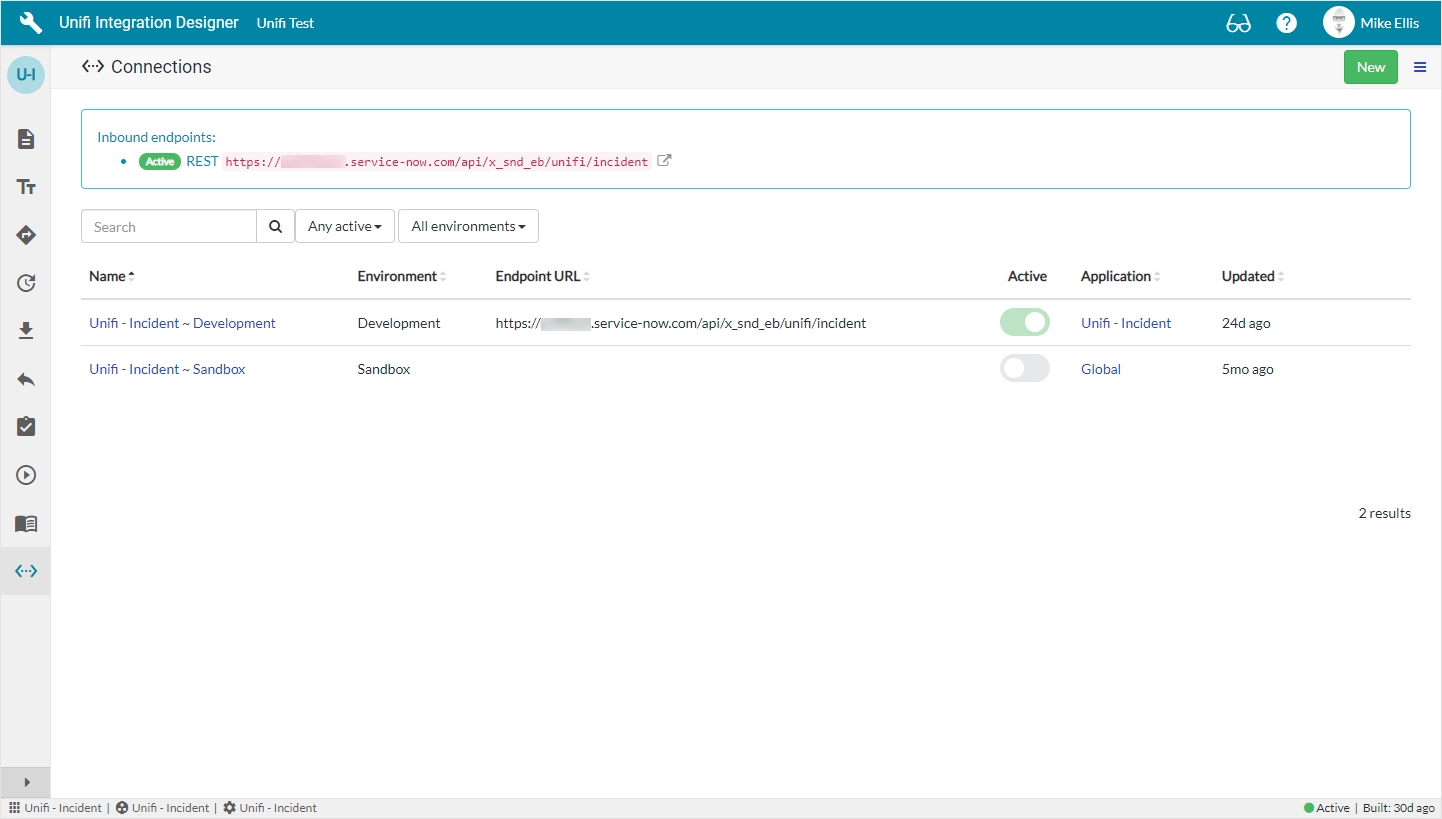
The Inbound endpoints for your Integration are clearly displayed in a widget at the top of the Connections page. Clicking the link to the right of the endpoint url will open the Scripted REST Resource (in native ServiceNow) in a new window.
The Web Service (REST method) is automatically created when the Process is configured.
Outbound Connectivity
In order for a Connection to send messages to remote systems, you must provide an Endpoint URL and the method of authentication.
Authentication
Connections support several types of authentication: Basic, Mutual and OAuth.
Basic
Basic authentication is achieved by providing a username and password.
Mutual
Mutual Authentication (MAuth) using SSL certificates is available by selecting the Mutual auth checkbox and configuring certificates on a ServiceNow Protocol Profile record.
OAuth 2.0
You can connect using OAuth by configuring a ServiceNow OAuth Entity Profile.
To configure an OAuth Connection, follow the How to Setup an OAuth Connection Guide.
MID Server
If the system you are connecting to is behind a firewall (such as an internal service) you can specify a MID Server for the integration to communicate over.
Fields
The following table is a summary of the fields to be configured for the Connection record:
Environment
Reference
The environment this connection applies to.
Integration
Reference
The integration this record belongs to.
Description
String
Document variable usage, connection nuances etc. Used in auto documentation generation.
Endpoint URL
URL
The external system’s access URL.
Instance name*
String
Safety check to ensure production integrations are not sent updates from development instances and vice versa.
Authentication
String
The authentication method to use for this connection.
OAuth profile**
Reference
The OAuth Entity Profile to authenticate with.
User
String
The username used in basic authentication.
Password
Password2
The password used in basic authentication.
Inbound user
Reference
The user profile used by the external system for authentication. An active connection must be found for the user to gain access.
Mutual auth
Boolean
Use mutual authentication with each request sent to this connection when true.
Protocol profile***
Reference
The protocol profile to use with this connection.
MID server
Reference
The MID server this connection will use to send messages.
Application
Reference
The application containing this record.
Active****
Boolean
Use this connection for the integration when true.
*Instance name:
If this value matches the property "instance_name" then requests will be sent, otherwise the HTTP Request will be errored with an explanation of why. Leave this value blank for legacy connection processing, i.e. always send when the connection is active.
**OAuth profile:
This field is visible when ‘OAuth’ has been selected as the choice from the Authentication field.
***Protocol profile:
This field is visible when Mutual auth is checked/set to ‘true’.
****Active:
Visible on the native ServiceNow platform record. Set to true by clicking the 'Enable' button. Set to false by clicking 'Disable'.
Connection Variables
A Connection Variable is simply a key-value pair. If you have multiple connection environments (e.g. Dev, Test, Prod) - each containing different data, or information that needs to be passed between environments but changes - then use Connection Variables to provide a consistent entry point in the code.
They are accessed via the variables object and can be used in most scripts. See the Variables page for details.
Example Use Cases
They can be used to define static data as variables that can change between endpoints. The following example is from the Outbound Settings for a Message:
They could also be used instead of scripting data values directly into the code of Poll Processor scripts. See the following Guides for examples:
Was this helpful?


