Integration
This is what defines the connection between a Process and the single system it's connecting with. It is also where most of the configuration and settings are stored.
New Integration
Back in the Unifi Integration Designer window, after clicking either on the '+' tile or 'New Integration', you are given a 'New Integration' modal to complete.
The fields to be configured for the New Integration modal are as follows:
Name
The name of the integration.
<Your Name>
Service type*
The type of web service this integration is using (Choices: SOAP/REST).
'REST'
Message format*
Automatically pre-process incoming messages for simpler message scripting. (Choices: XML, JSON, Advanced)
'JSON'
*Service type/Message format: these values are defaulted.
Your 'New Integration' modal should look like this:
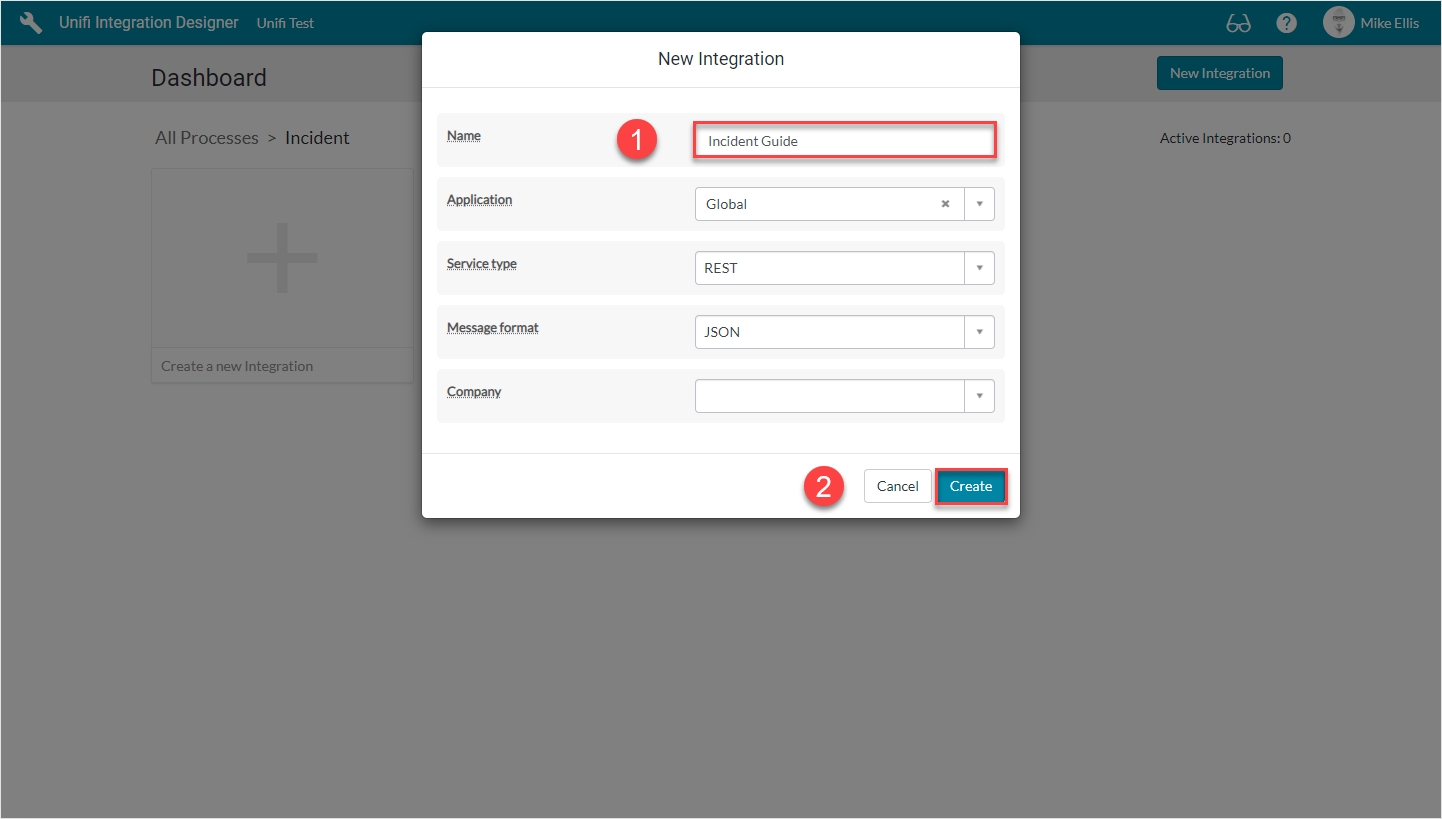
Click Create.
You will be redirected to the Details page of the newly created Integration.
Icons
Before continuing we would like to draw your attention to some of the relevant icons that are now visible down the left hand navigation strip.
The icons are:
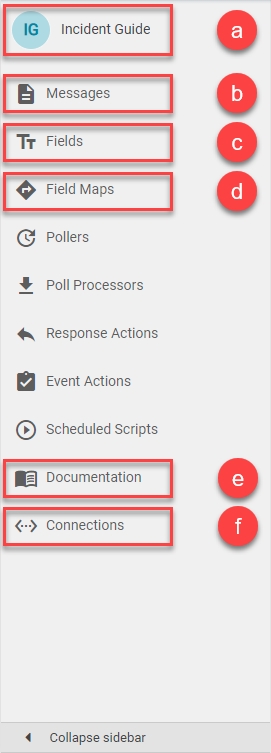
a) 'Integration' icon: Opens the current integration's Details page.
b) 'Messages' icon: Opens the current integration's Messages page.
c) 'Fields' icon: Opens the current integration's Fields page.
d) 'Field Maps' icon: Opens the current integration's Field Maps page.
e) 'Documentation' icon: Opens the automatically generated documentation for the current integration. (Another awesome feature in Unifi.)
f) 'Connections' icon: Opens the current integration's Connections page.
Details
The Details page of your Integration should look like this:
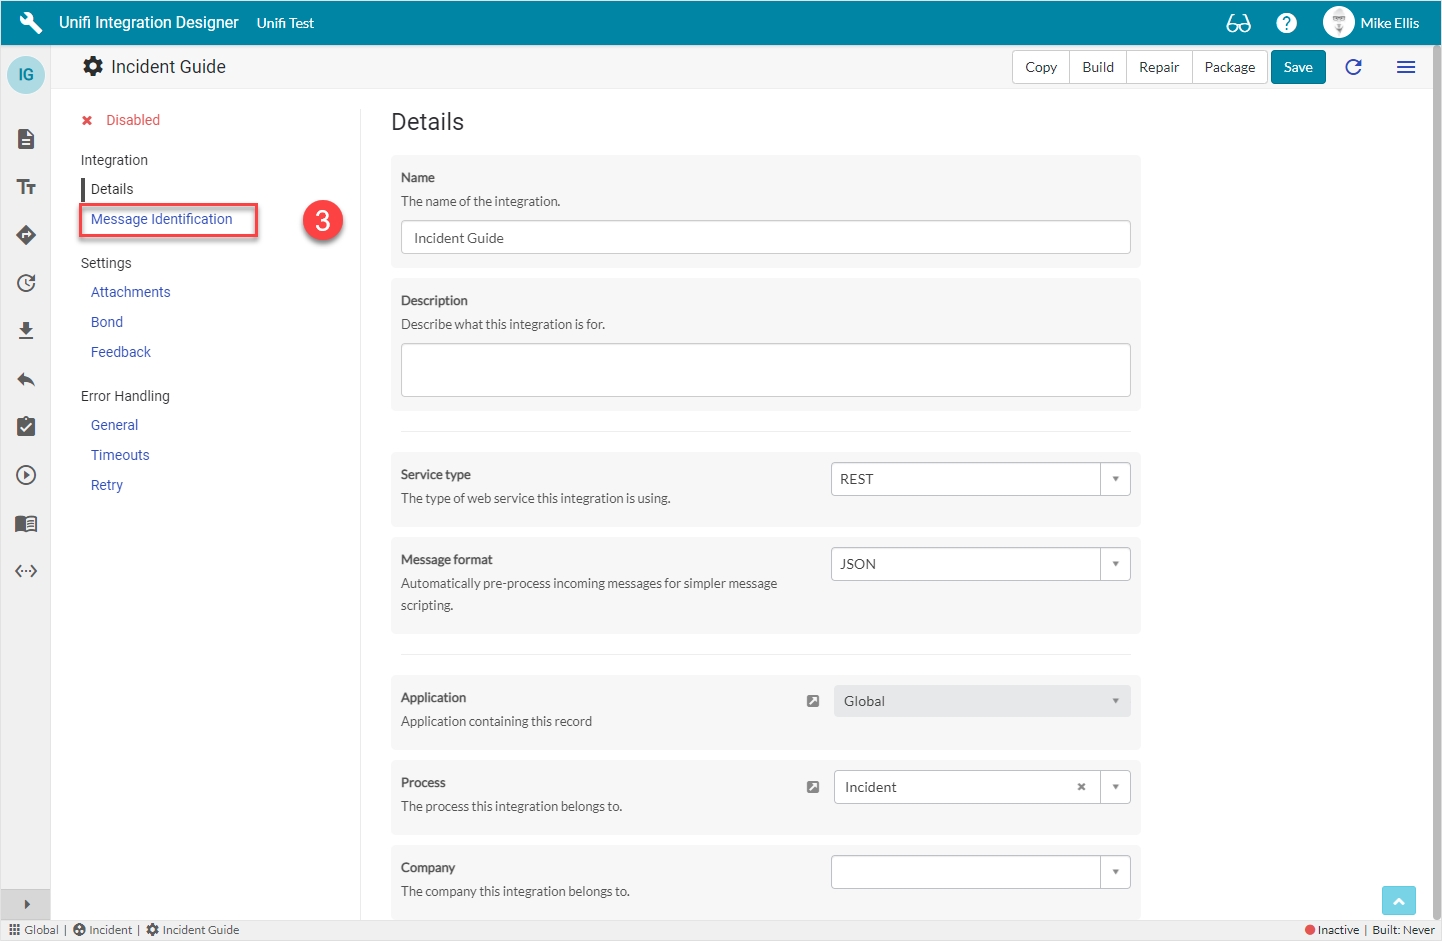
Navigate to Integration > Message Identification.
Message Identification Fields
Unifi needs to identify the name of the inbound message in order to know how to process the inbound data.
Update the code in the 'Identify message script' field so that it looks like this:
The Message Identification form should look like this:
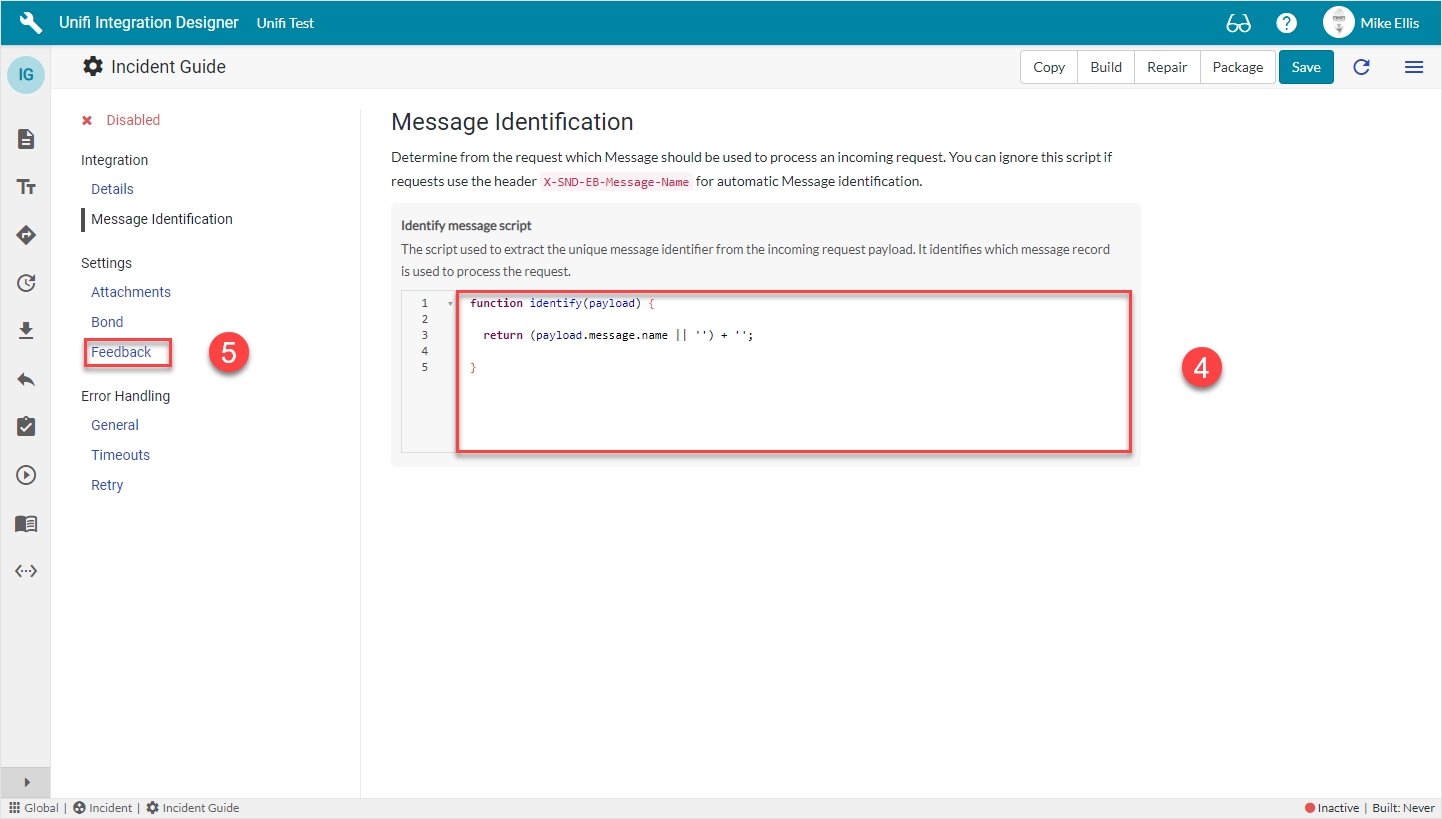
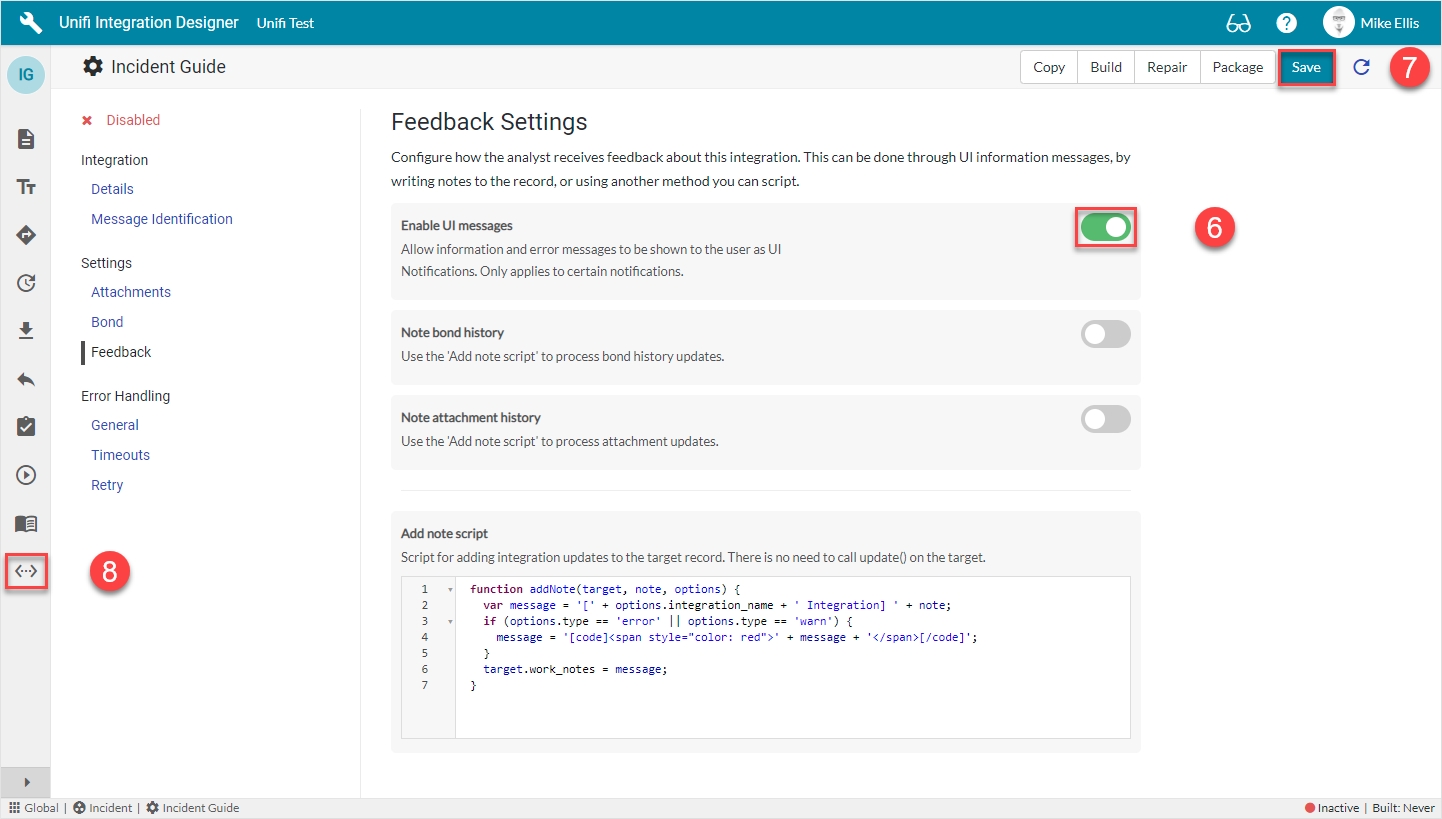
Navigate to Settings > Feedback.
Feedback Settings Fields
The Feedback fields to be configured for the Integration record are as follows:
Enable UI messages
Allow information and error messages to be shown to the user as UI Notifications. Only applies to certain notifications.
<true>
The Feedback Settings form should look like this:
All of the remaining 'Settings' values are to be left as-is:
Attachments Settings
Bond Settings
All of the 'Error handling' values are to be left as-is:
General
Timeouts
Retry
Click Save.
Click the 'Connections' icon to move on and configure the Connection.
