You should have successfully configured a Poll Processor and Poller. You should also have configured the ResolveIncidentInbound message. The next thing to do is to test.
It may help to esure the Poller we created is turned off (Active set to 'false') whilst conducting these tests and to manually execute it as required (this can still be done even if the Poller is inactive). This is so that we don't have to wait for the Poller to run, but rather manually activate it when needed by clicking 'Execute Now'.
To turn off the Poller, in the Unifi Integration Designer window, navigate to the 'Pollers' icon & set Active to false. (If you've created this Multiple Message Poller by editing the previously configured Update Poller, it may already be inactive.)
Our Poll Processor has been configured to poll for updates from our PDI and make a decision, telling Unifi which Message to use to process that data. We will therefore test our poller by means of testing both of the inbound Messages on our Integration:
UpdateIncidentInbound
ResolveIncidentInbound
We will look in more detail at the steps for each over the next couple of pages.
First, we shall test the UpdateIncidentInbound Message.

Follow these steps to test the ResolveIncidentInbound Message.
In the remote instance (your PDI), navigate to < Your Incident > created in the earlier test.
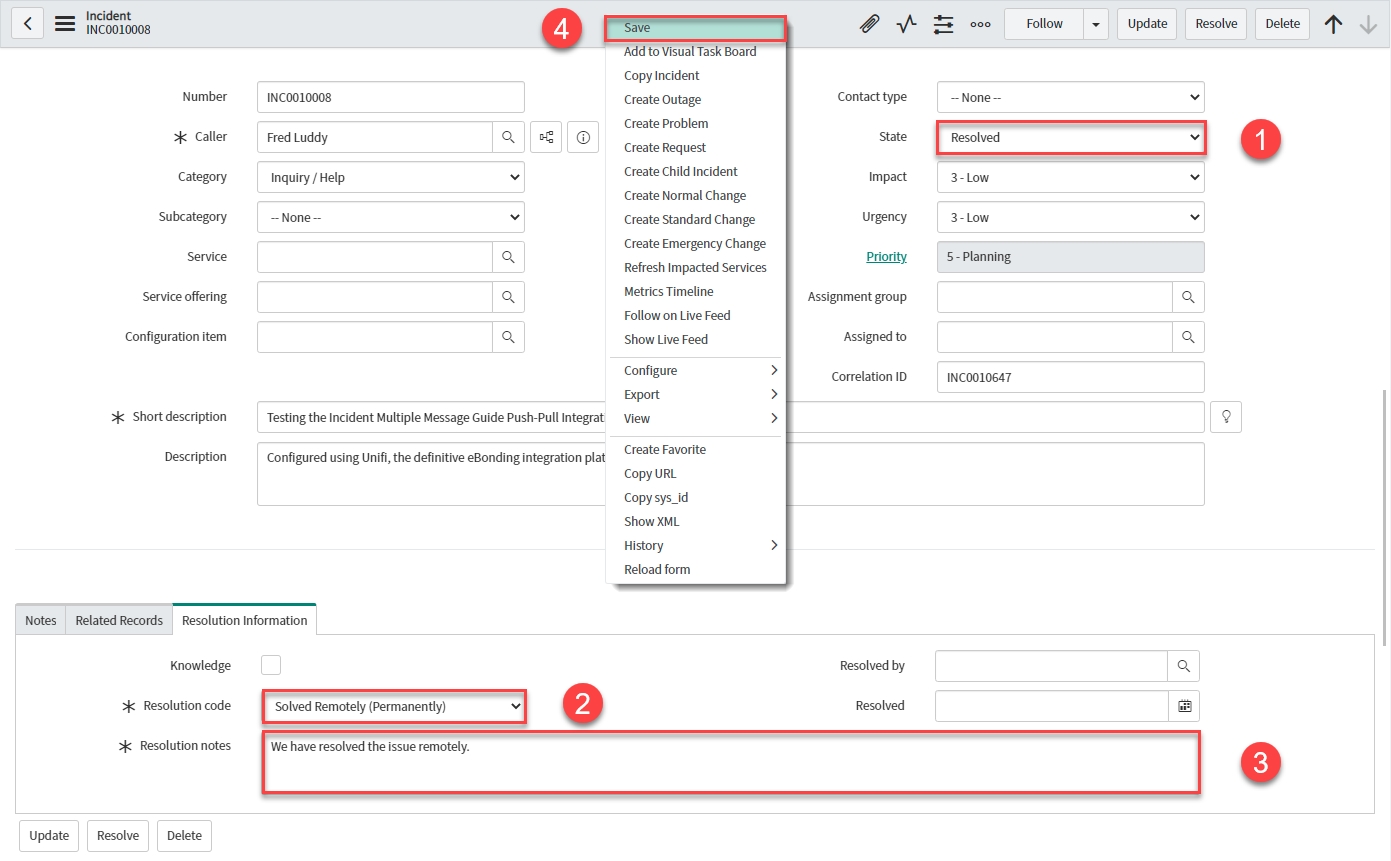
Update the Incident record as follows:
State
The Incident lifecycle state.
‘Resolved’
Resolution code
The Incident resolution code.
<Your Resolution code>
Resolution notes
The Incident resolution notes.
<Your Resolution notes>
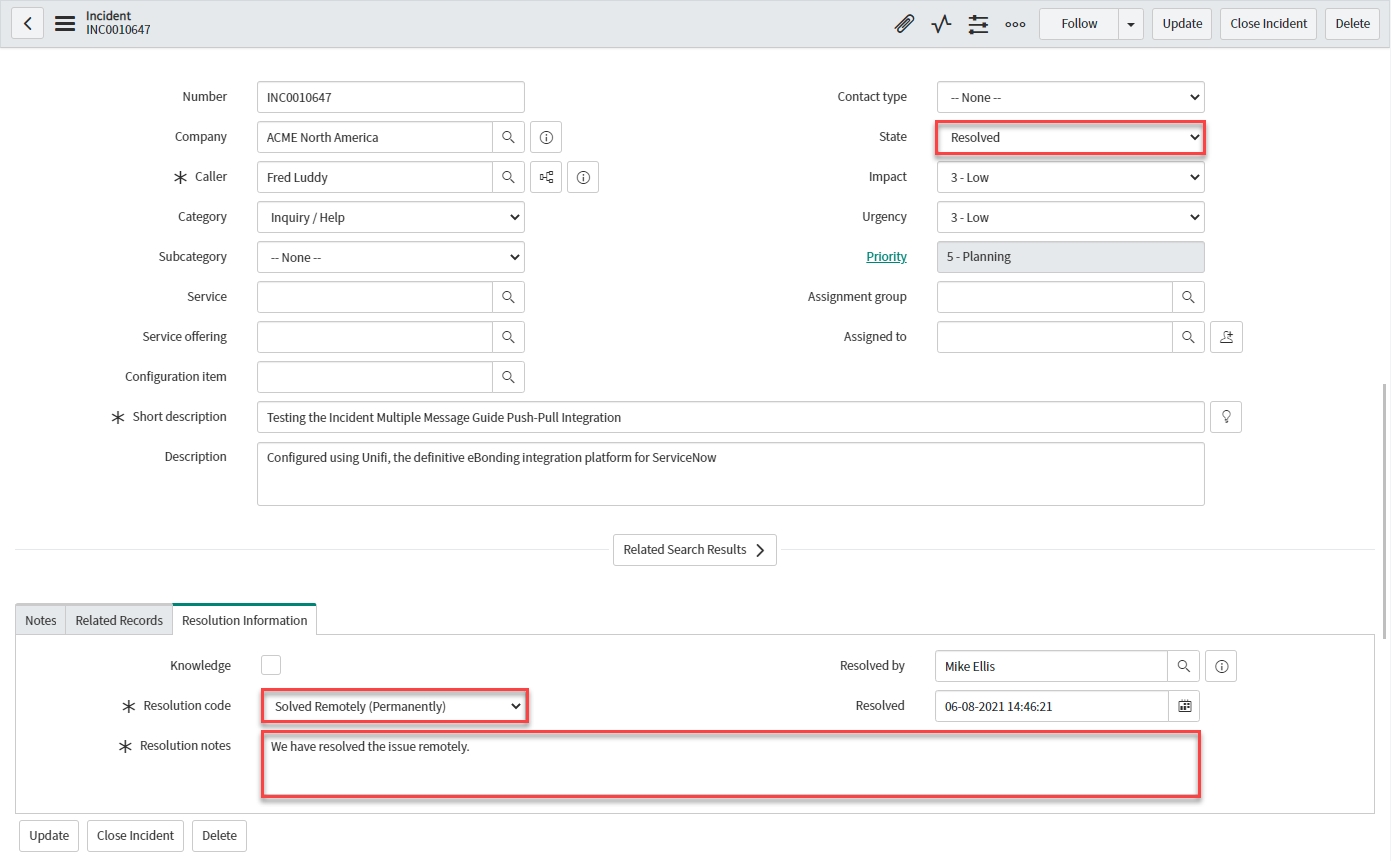
Your Incident record should look like this:
Right-click & Save.
Back in the originating instance, navigate to & open < Your Poller >. Click Execute Now.
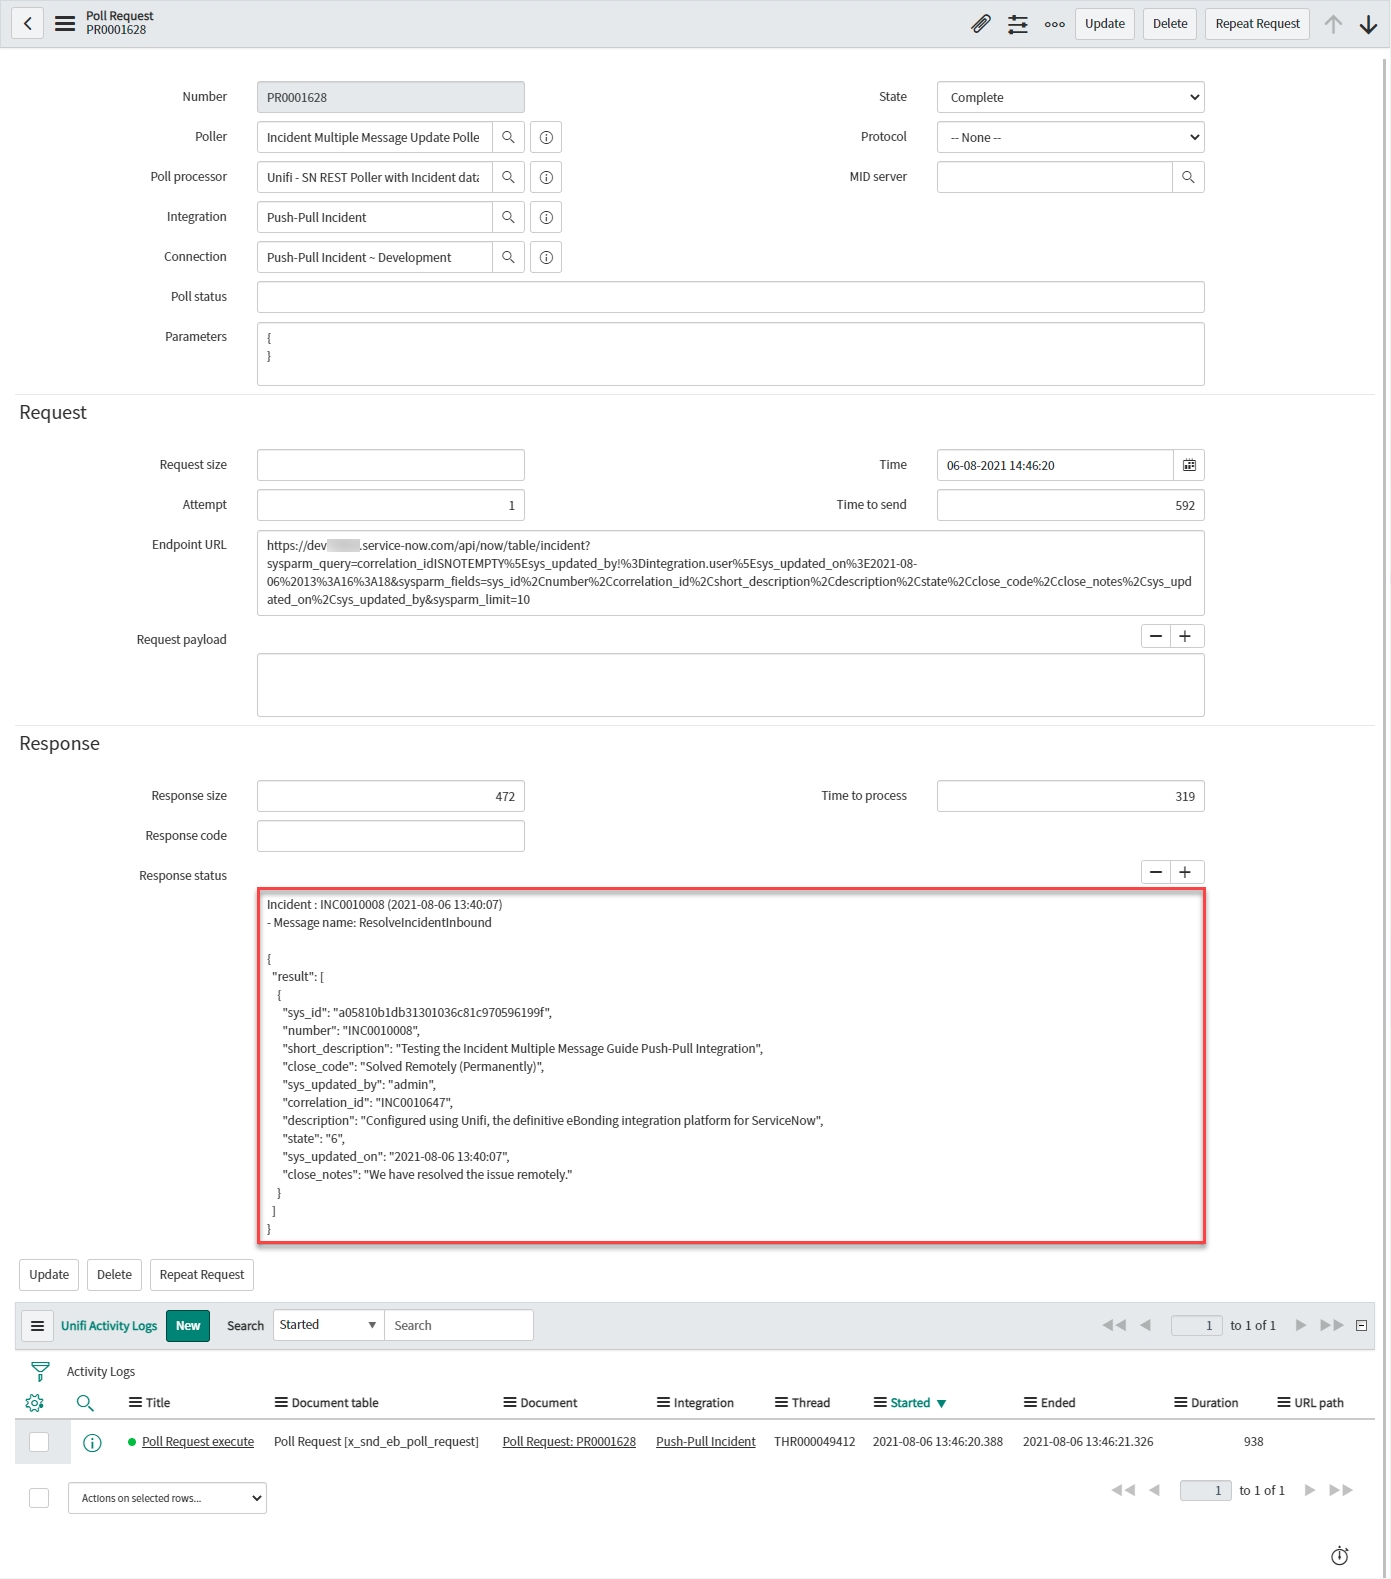
Open the corresponding Poll Request & confirm that the Incident was found (and the Message name was ResolveIncidentInbound):
View the Transactions that have been sent. This can be done either in Native ServiceNow, or in Unifi Operations Manager.
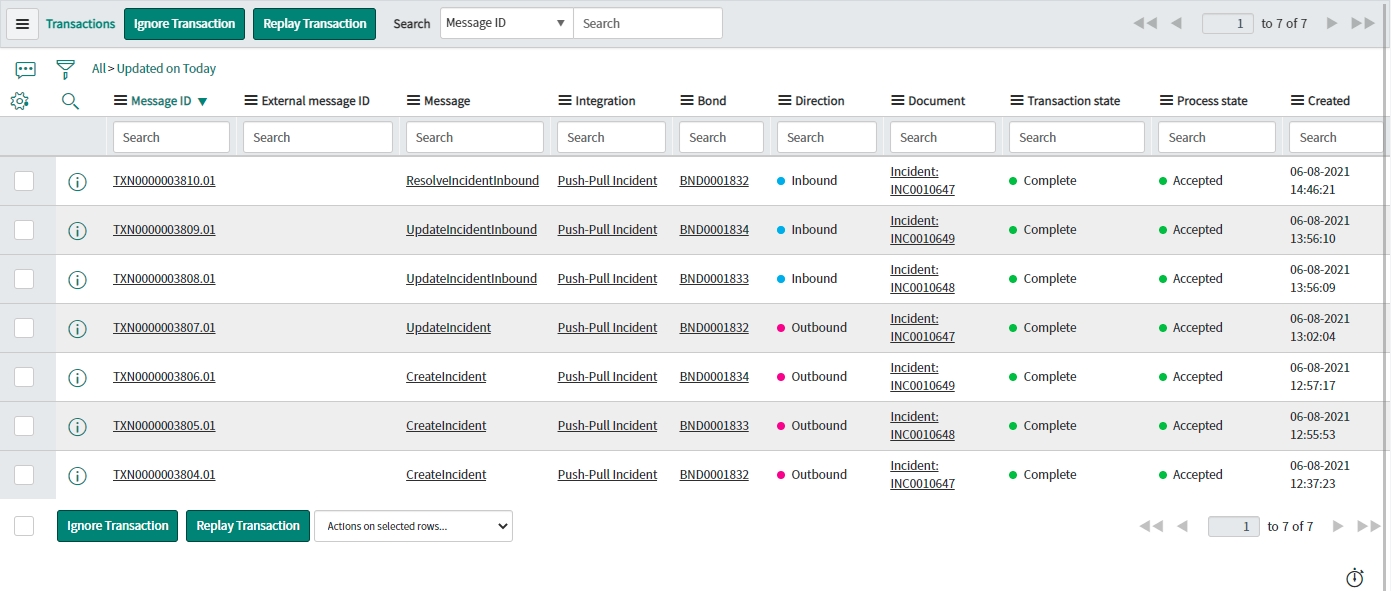
Navigate to Unifi > Transport > Transactions.
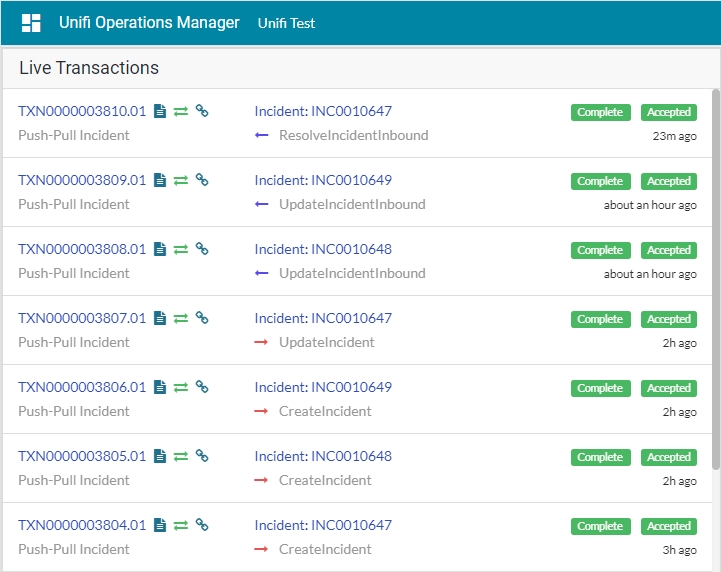
Navigate to Unifi > Unifi Operations Manager.
We can see that the ResolveIncidentInbound message has been received, is Complete & Accepted and displays the relevant Incident & Bond numbers.
Confirm the Transaction has updated the bonded ticket in the originating instance:
We can see that the State, Resolution code & Resolution notes have been updated on the bonded ticket.
Navigate to the Notes tab to view the Activities stream:
We can see that the update has also been logged in the Activities stream.
Follow these steps to test the UpdateIncidentInbound Message.
To test our integration we will need some bonded tickets in the remote instance. If there aren't any already in place, then they'll need to be created.
In native ServiceNow, navigate to Incident > Create New.
The Incident fields to configure are as follows:
Caller
Person who reported or is affected by this incident.
<Your Caller>
Short description
A brief description of the incident.
<Your Short description>
Description
Detailed explanation on the incident.
<Your Description>
Though the CreateIncident Message has been configured to map more than just the Short Description & Description fields, we have only filled these fields because that is all whe have included in the payload of our Poller.
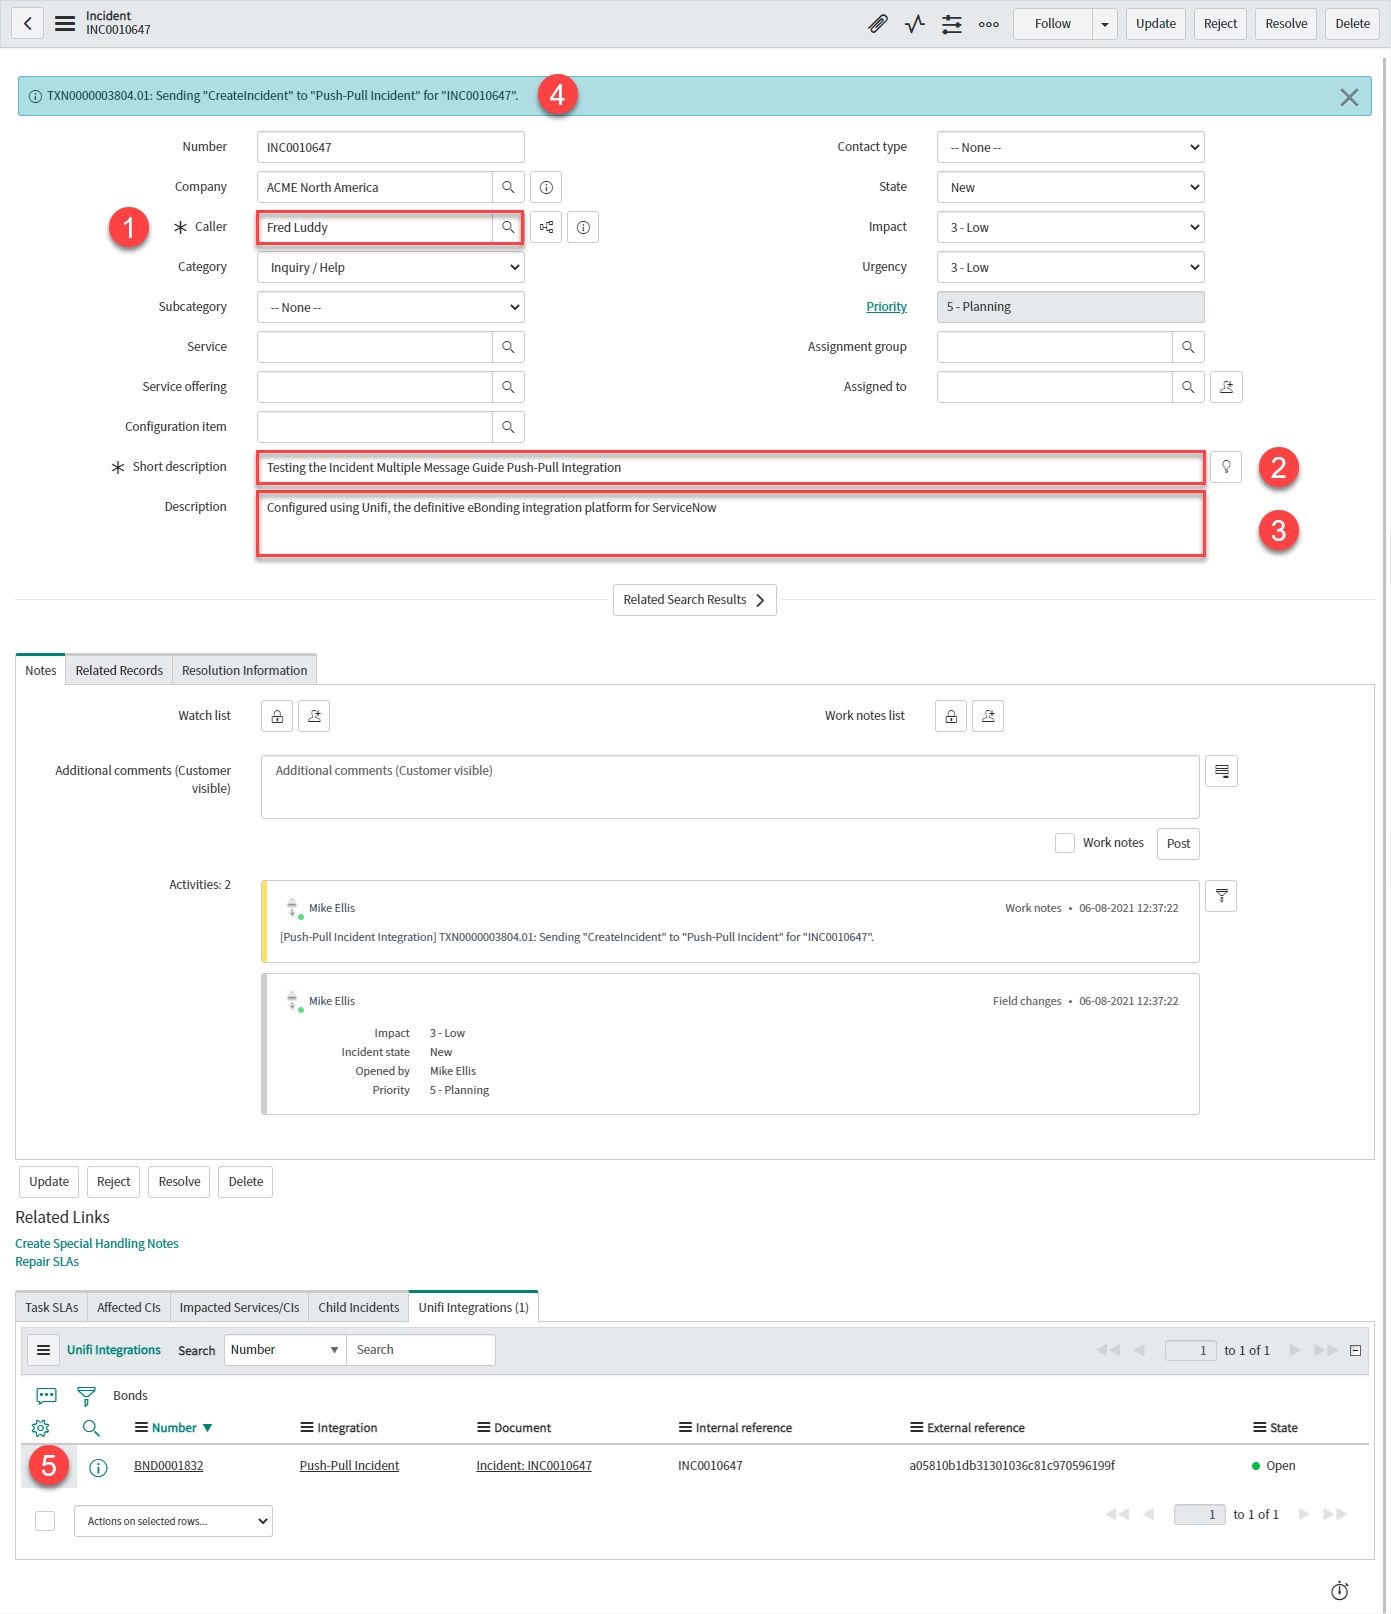
Your Incident form should look like this:
Note the Info Message confirming the CreateIncident Message is being sent to your Integration.
Note the Bond is 'Open' and both the Internal & External reference are in place.
Repeat as necessary so that there are two or three bonded tickets in the remote instance:
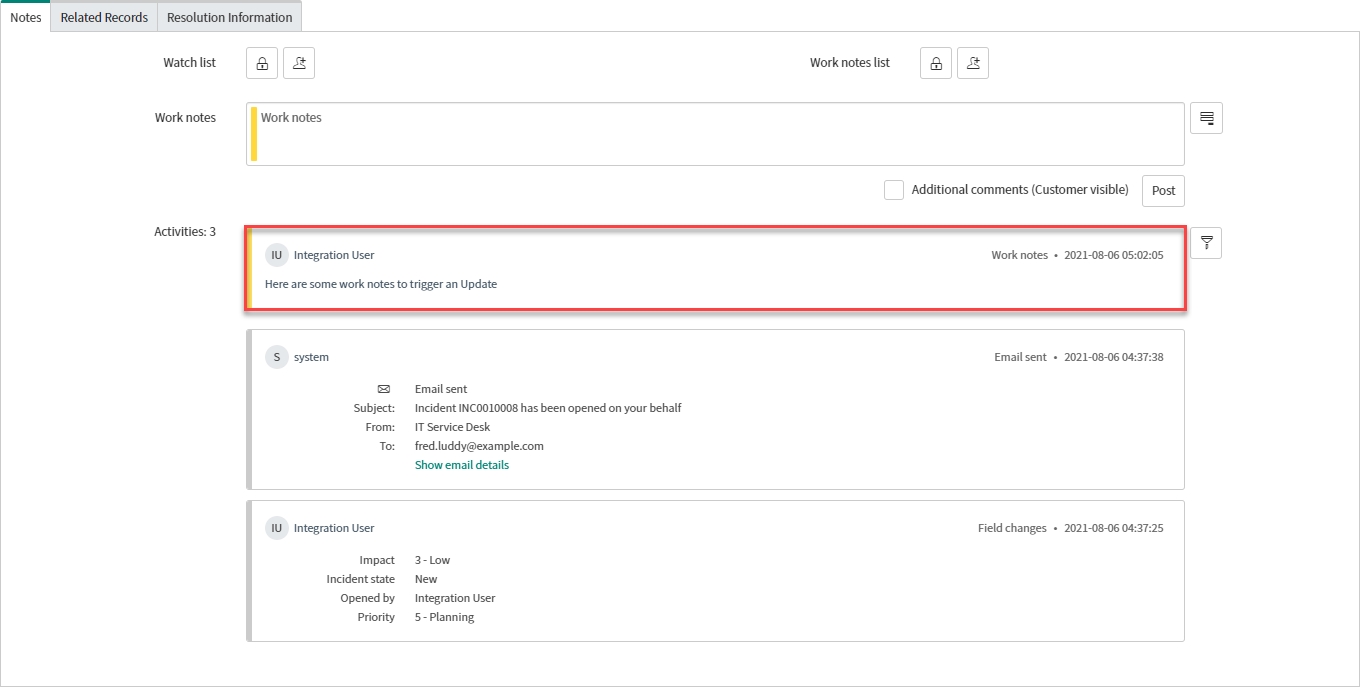
Update one of the bonded tickets in the originating instance to cause the UpdateIncident Message to fire:
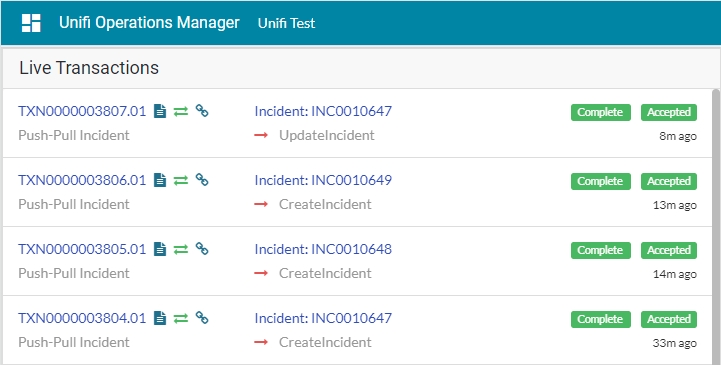
View the Transactions that have been sent. This can be done either in Native ServiceNow, or in Unifi Operations Manager.
Navigate to Unifi > Transport > Transactions.
Navigate to Unifi > Unifi Operations Manager.
We can see that the three CreateIncident messages & one UpdateIncident message have been sent. All are Complete & Accepted & display the relevant Incident & Bond numbers.
Confirm the Transaction has updated the bonded ticket in the remote instance:
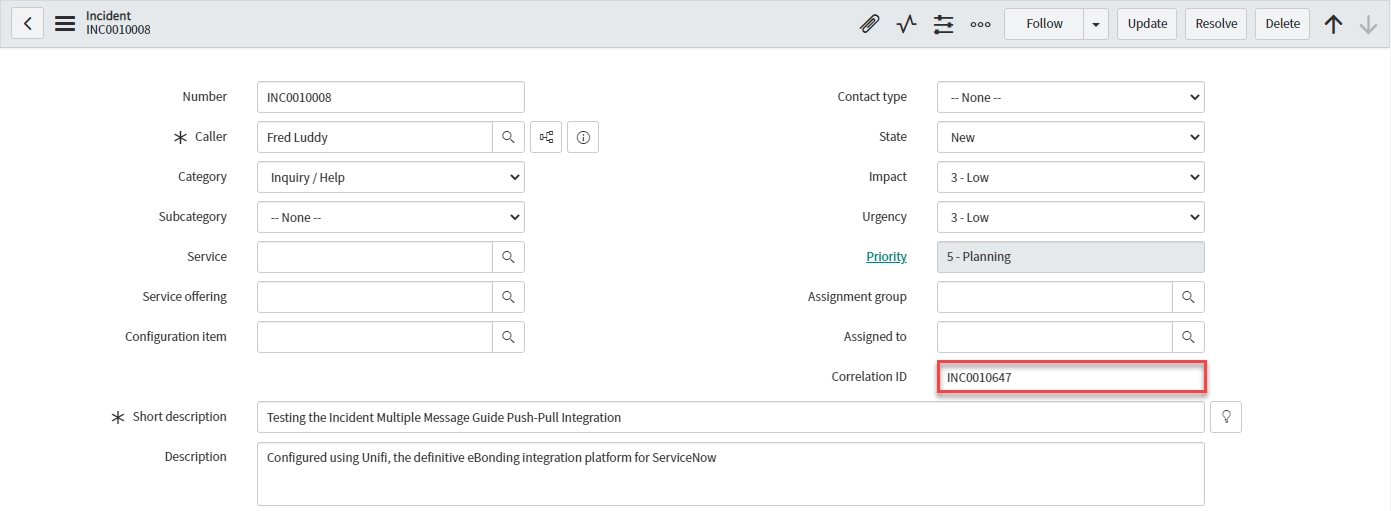
We can see that the update has reached the bonded ticket (& that the correlation id matches the outbound Incident number)
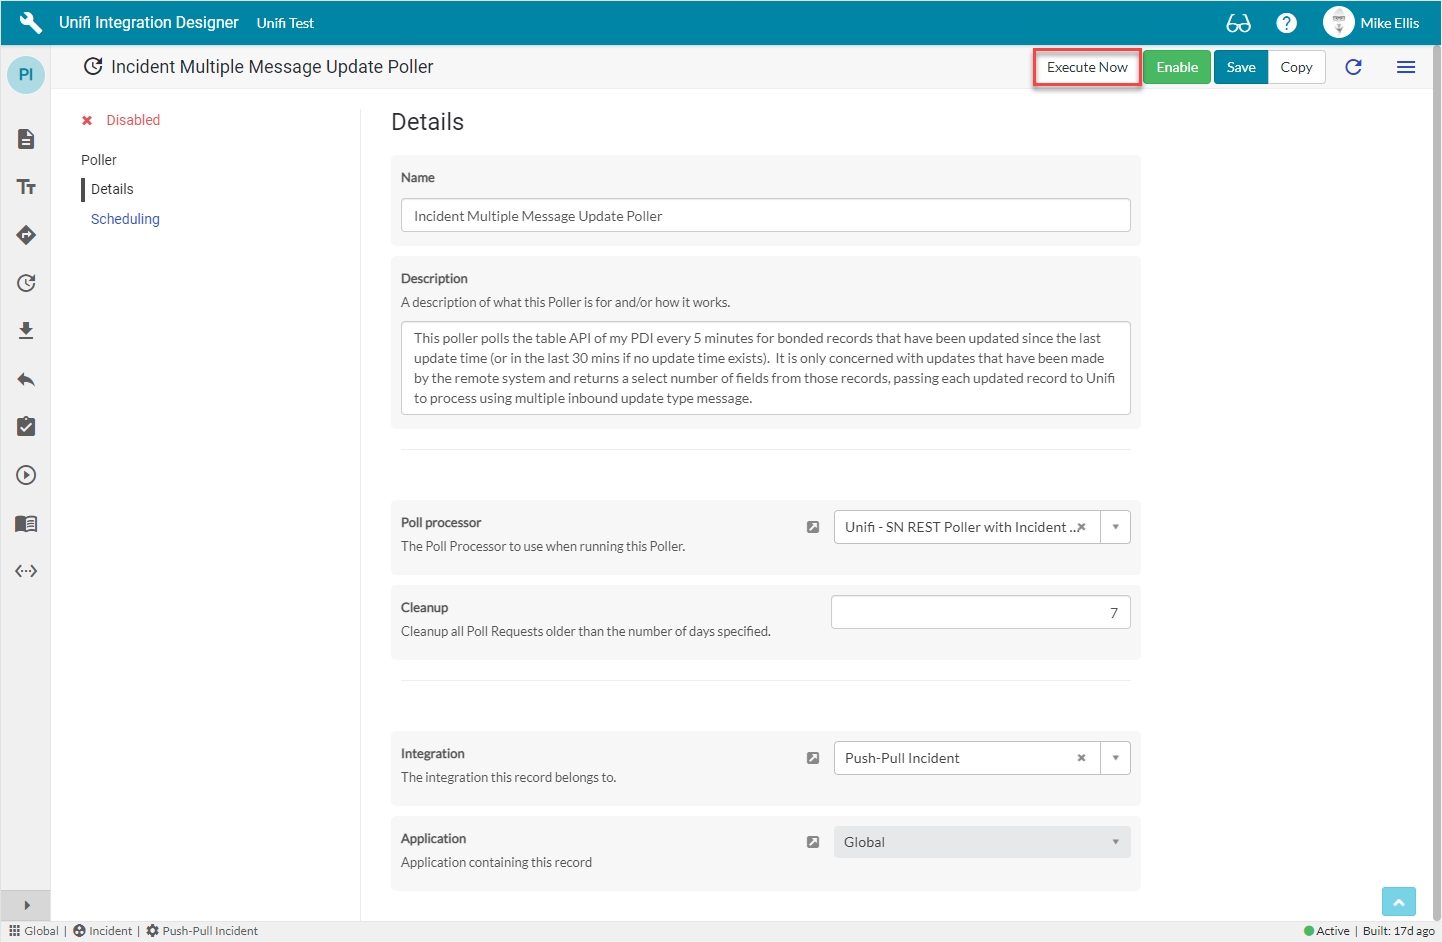
In Unifi Integration Designer, click on the 'Pollers' icon. Navigate to & open < Your Poller > (created earlier). Click Execute Now:
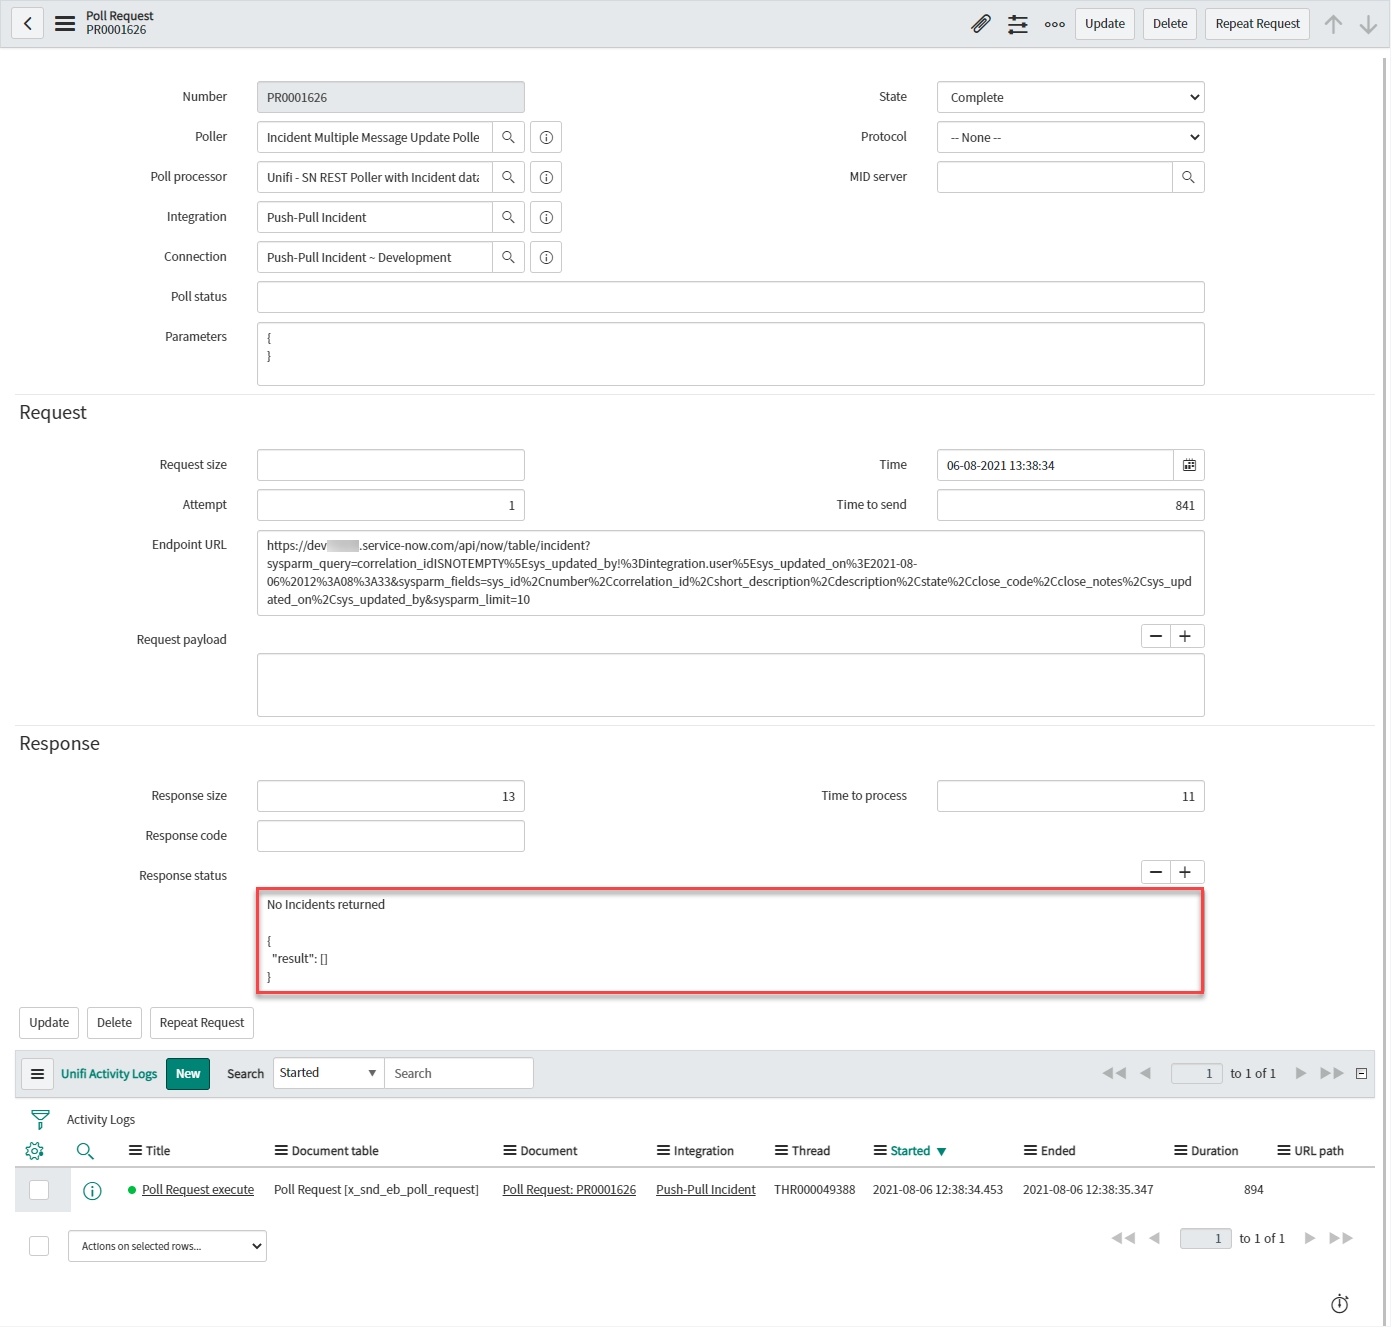
In native ServiceNow, navigate to Unifi > Polling > Poll Requests. Click to Open & view the generated Poll Request. Confirm that no Incident was found (this is exactly as we expect because we are only polling for updates made by the remote instance):
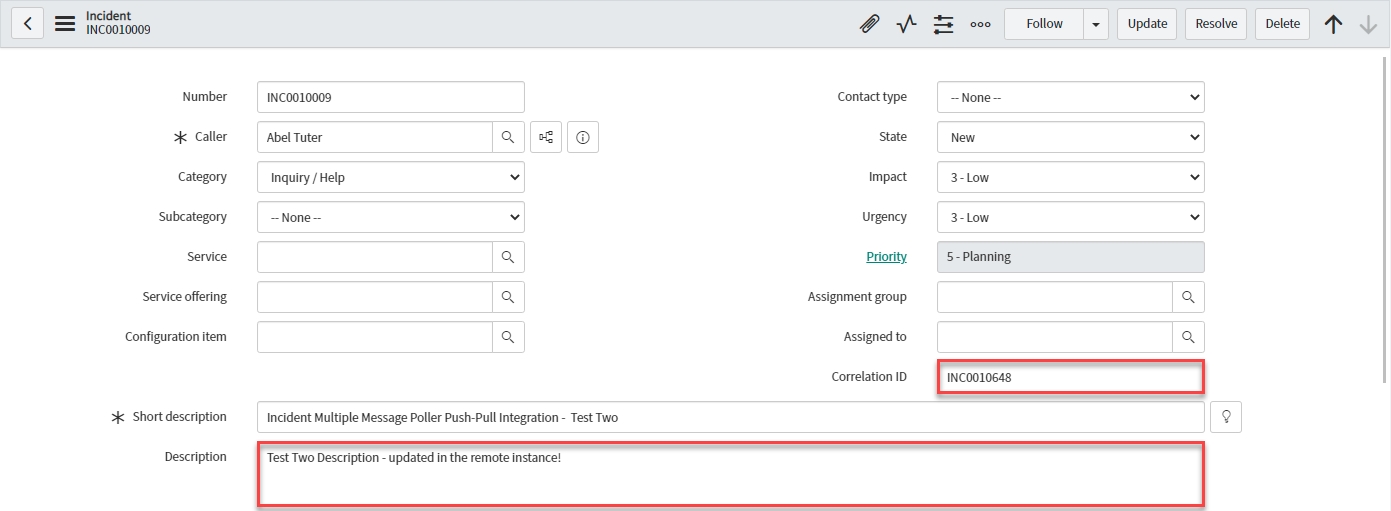
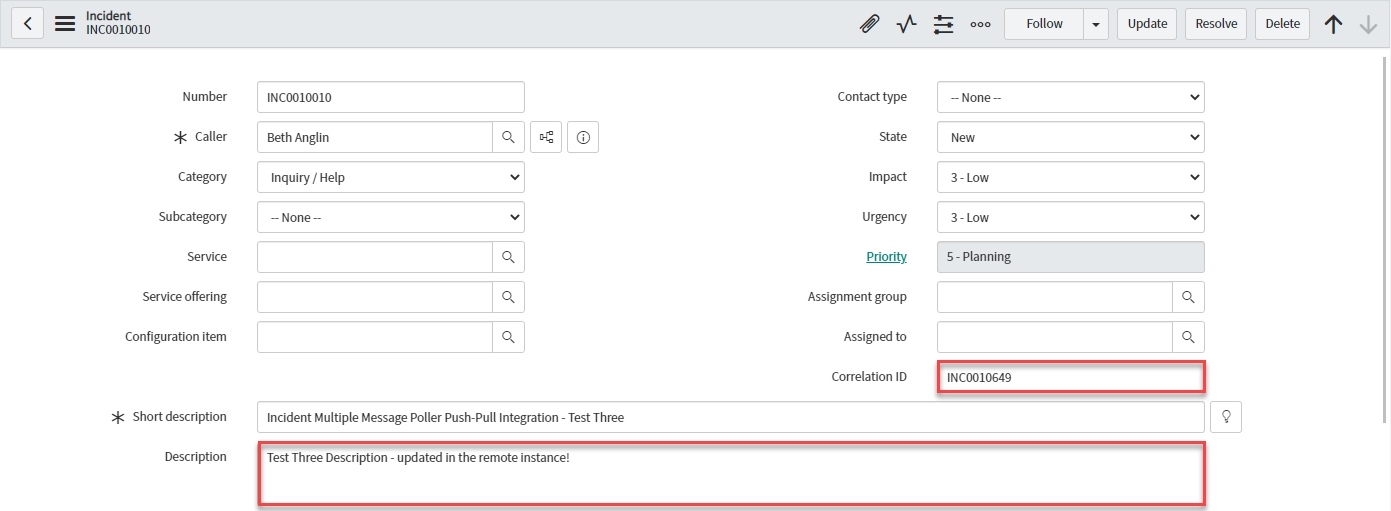
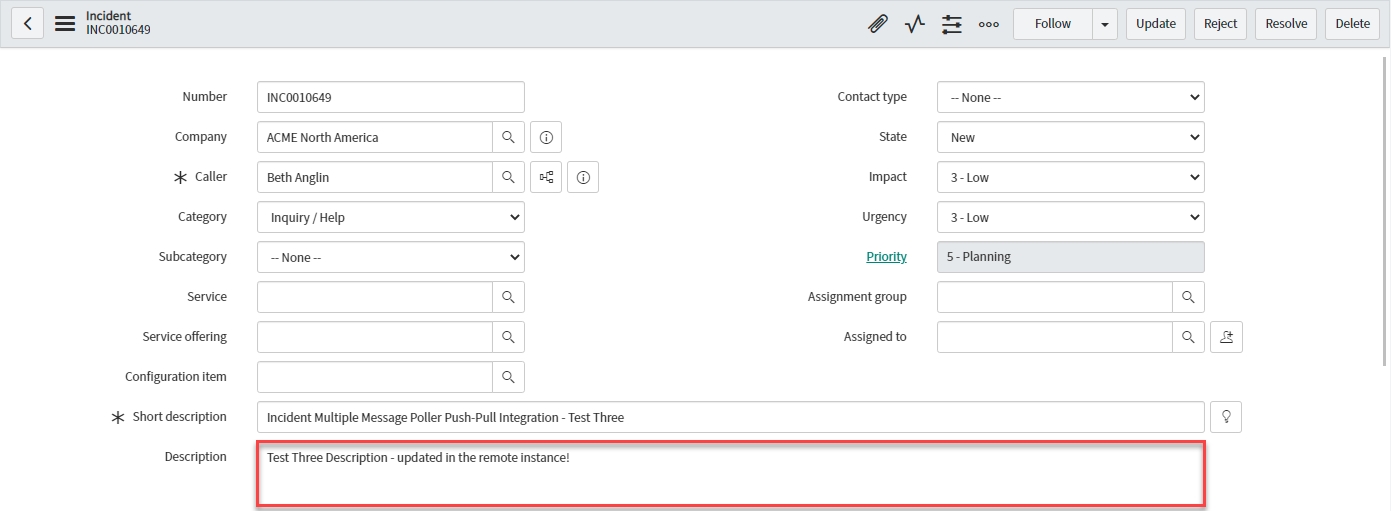
in the remote instance, update two of the bonded tickets in turn.
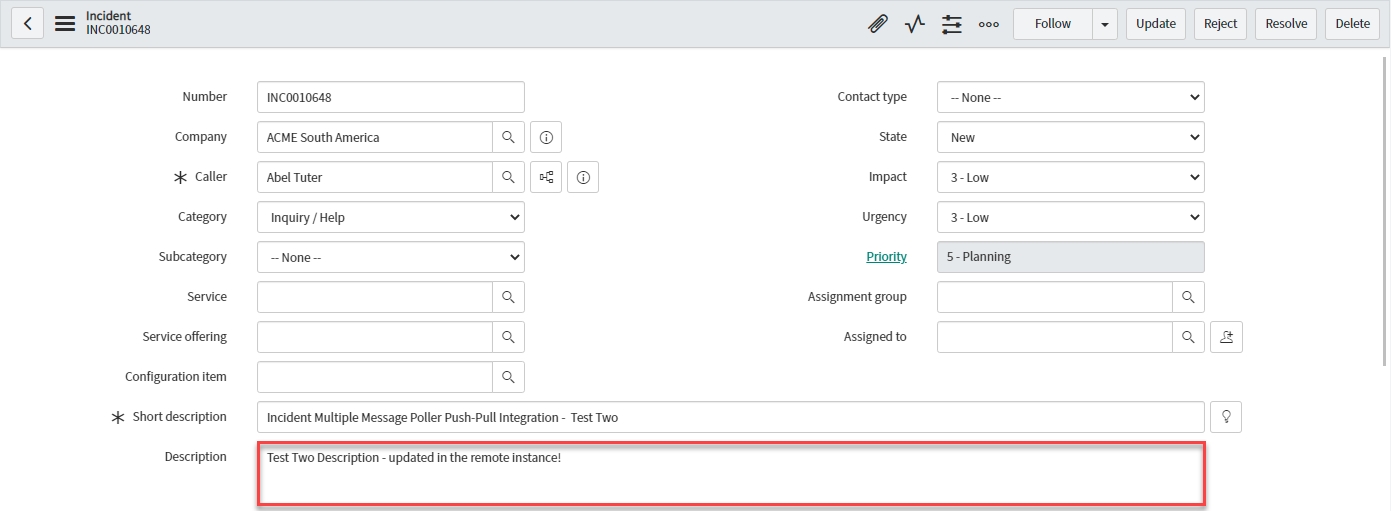
Updates have been made to the Description field only. Correlation ID is highlighted for us to identify the correct bonded ticket.
Back in the originating instance, navigate to & open < Your Poller >. Click Execute Now.
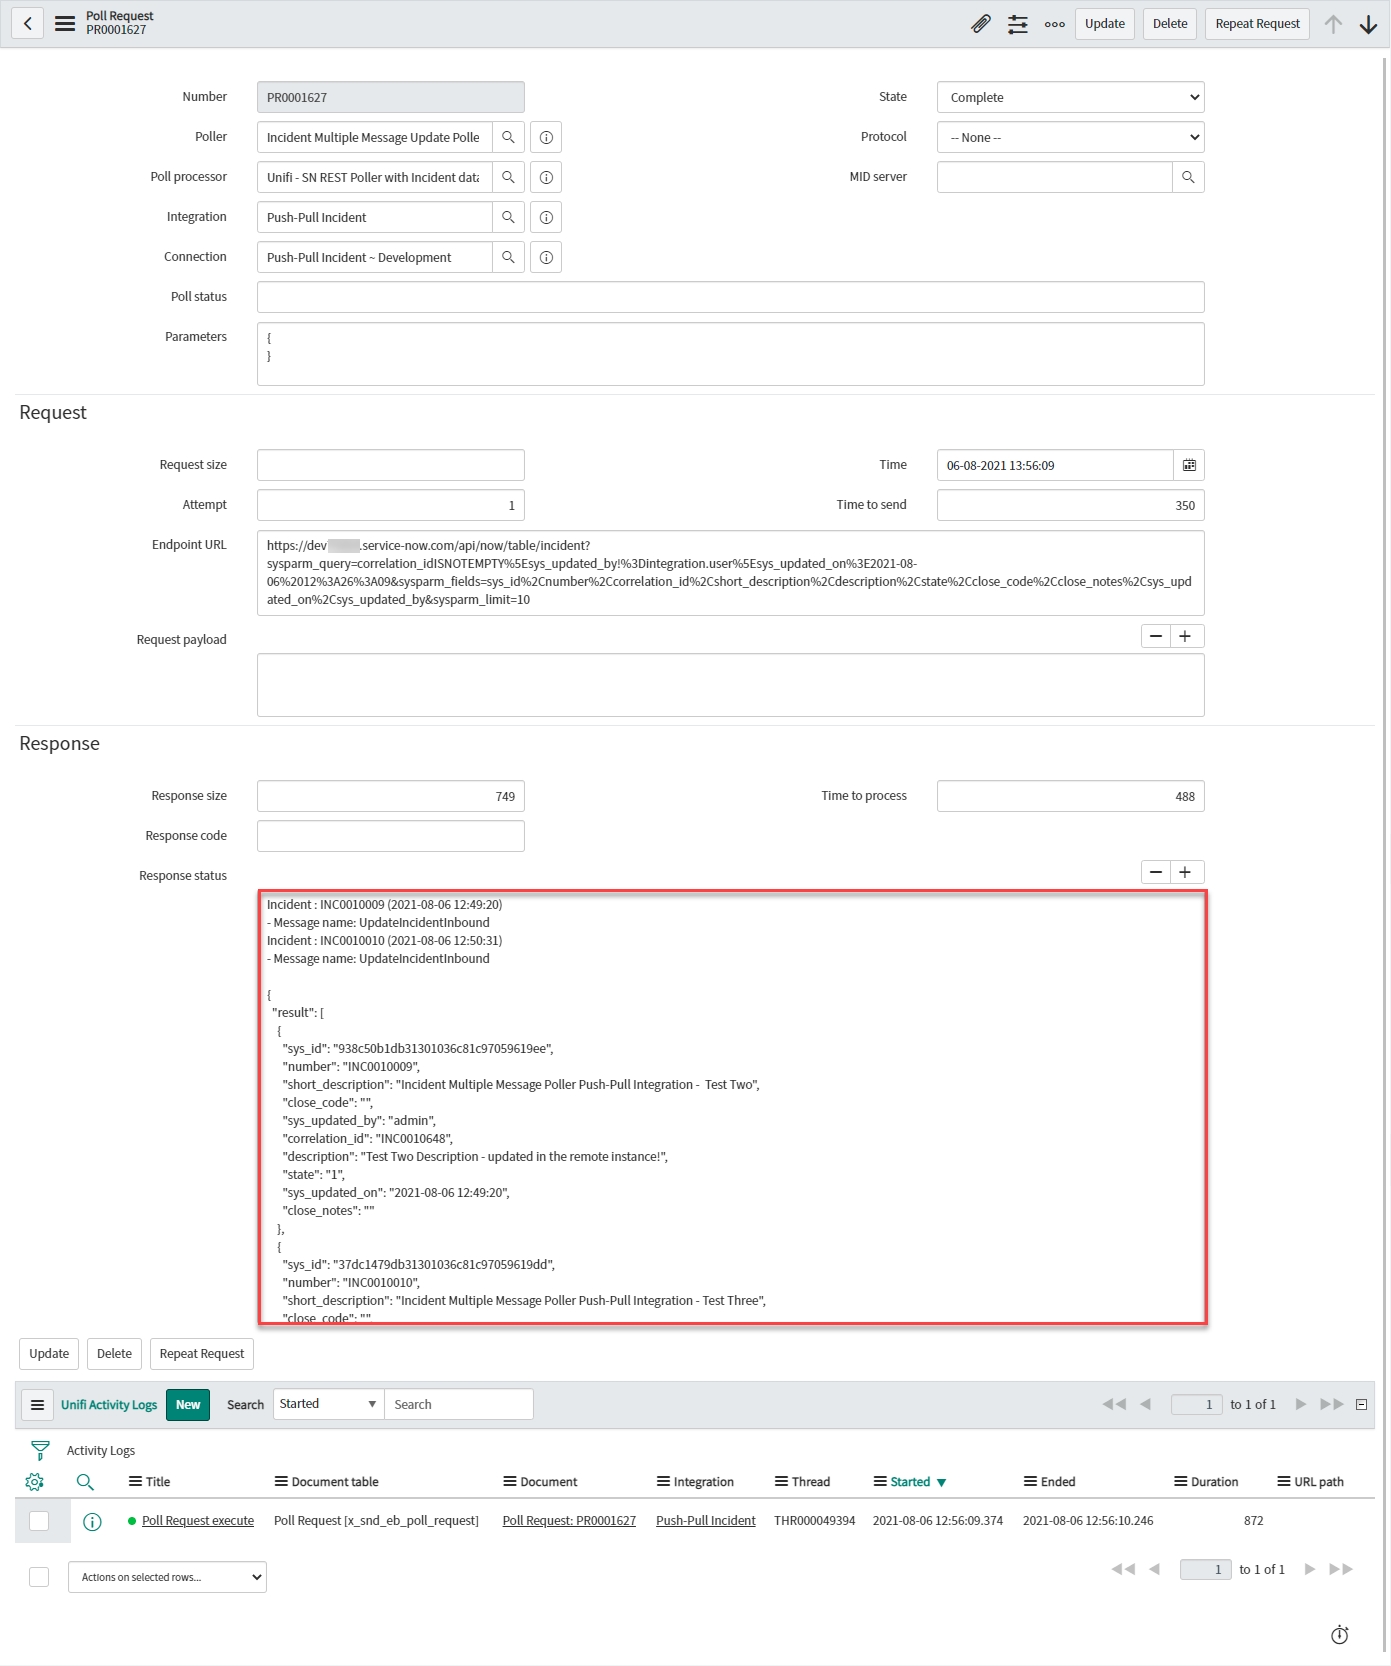
Open the corresponding Poll Request & confirm that both Incidents were found (and only those) and that the Message name was UpdateIncidentInbound:
View the Transactions that have been sent. This can be done either in Native ServiceNow, or in Unifi Operations Manager.
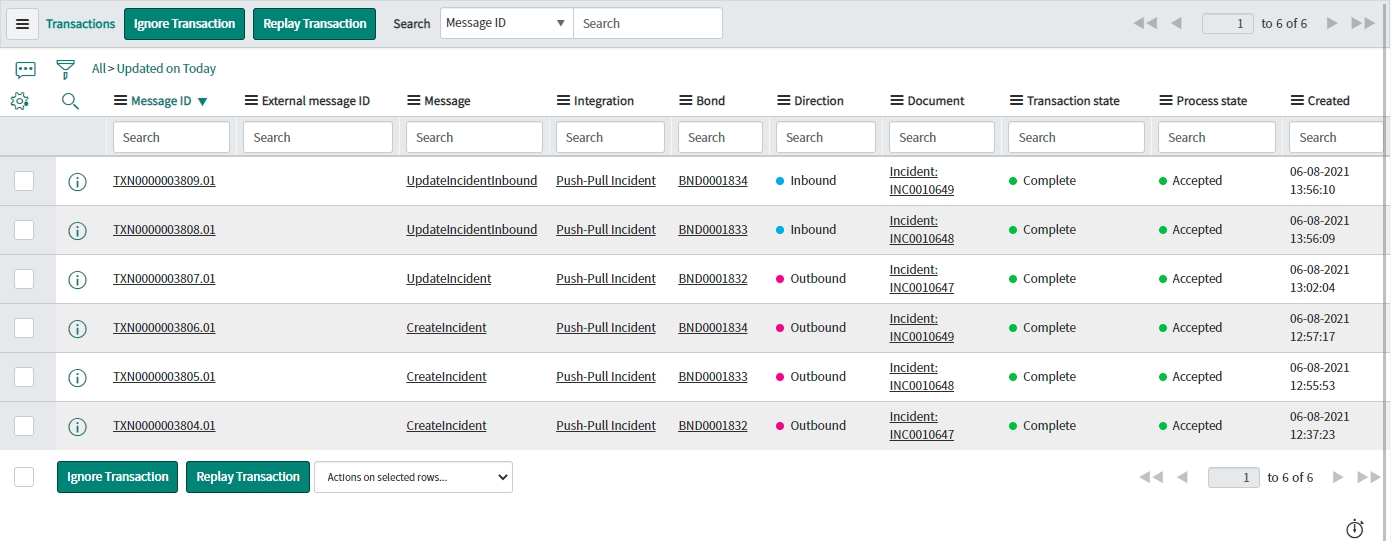
Navigate to Unifi > Transport > Transactions.
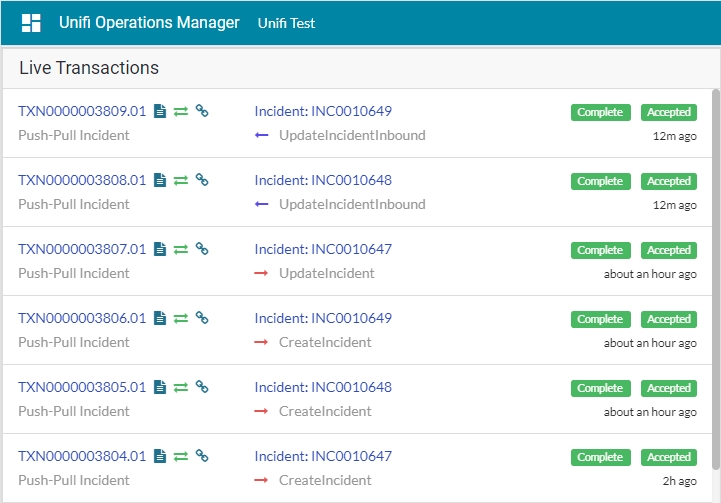
Navigate to Unifi > Unifi Operations Manager.
We can see that two UpdateIncidentInbound messages have been received. Both are Complete & Accepted & display the relevant Incident & Bond numbers.
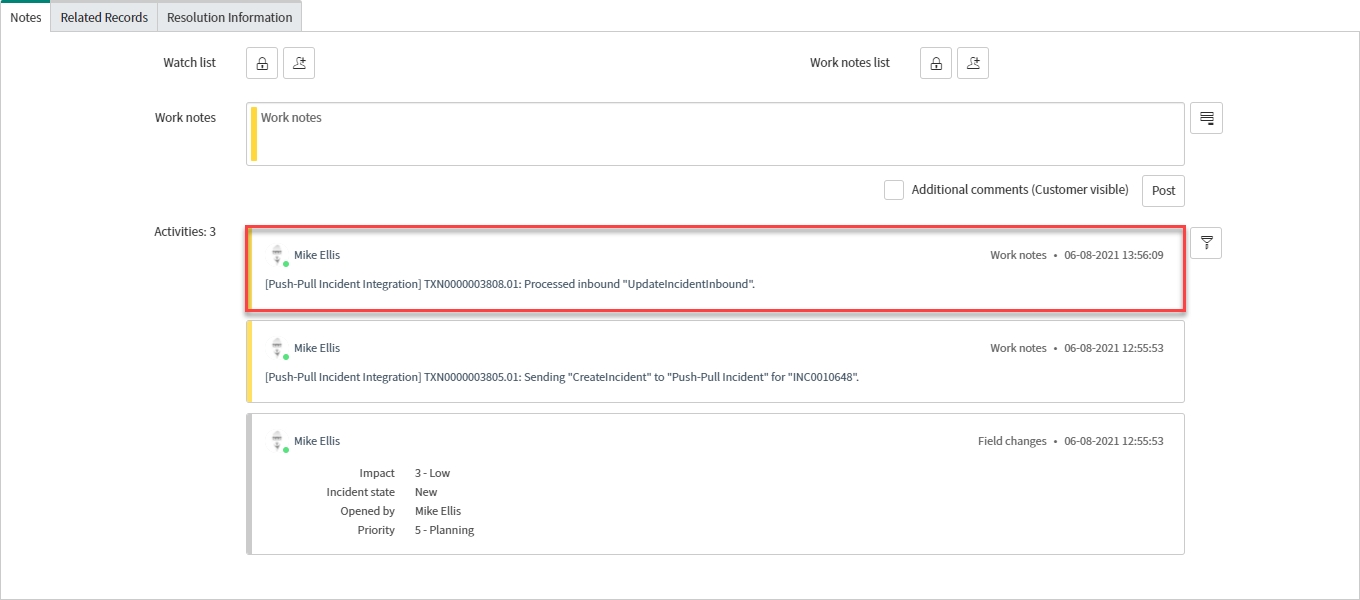
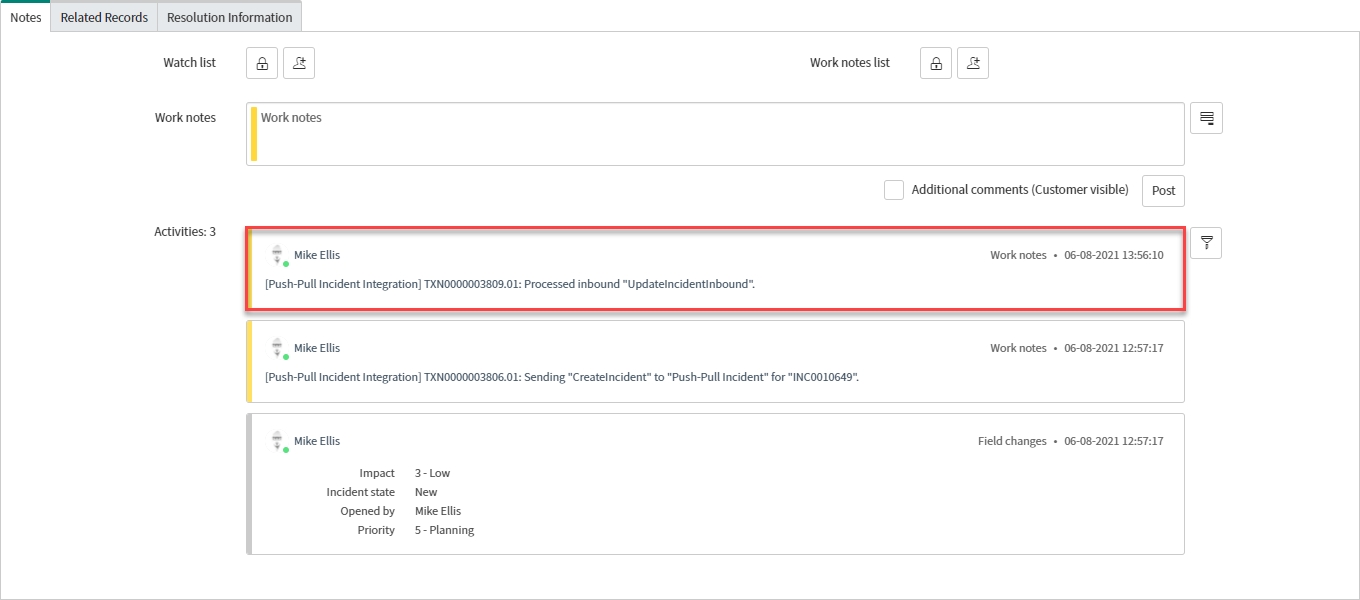
Confirm the Transactions have updated the bonded tickets in the originating instance.
For completeness, to prove we are only querying and pulling back data from bonded records, update an incident in the remote system which isn't bonded (Correlation ID is empty) & run the Poller again.
What do you expect to happen?
Next, we shall test the ResolveIncidentInbound Message.
